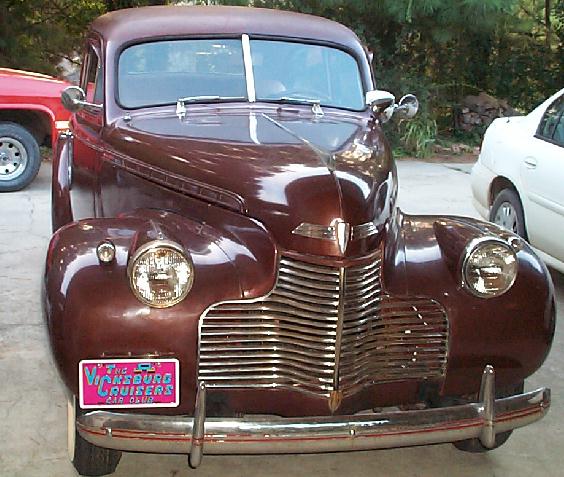
Back by popular demand.....
1940 Chevy 2 Door Sedan
from Original
to Street Rod
The car went to Louisville, KY to the NSRA Street Rod Nationals in 2003, 2004, 2005, 2006, 2007, 2008, and 2009!
Plus it's been to more car shows!
See below for the latest news.
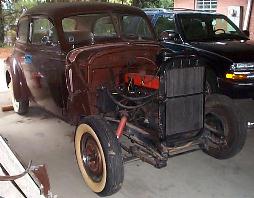
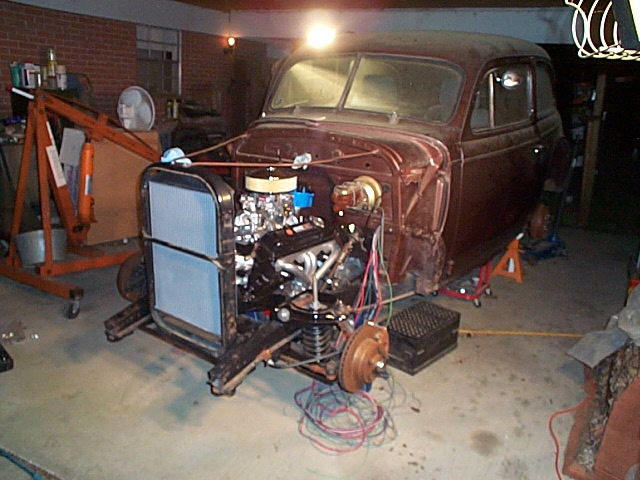
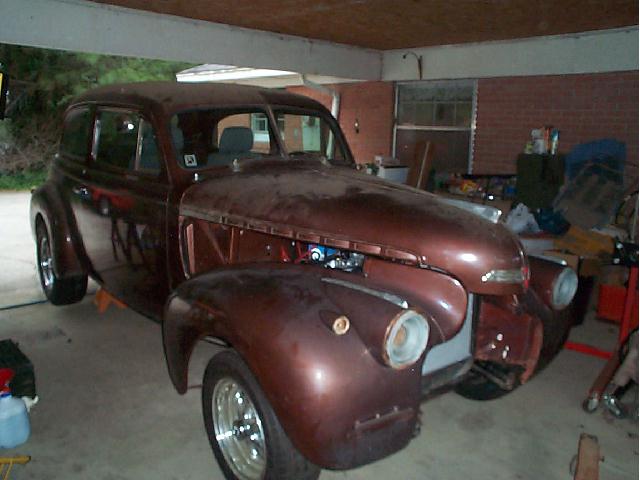
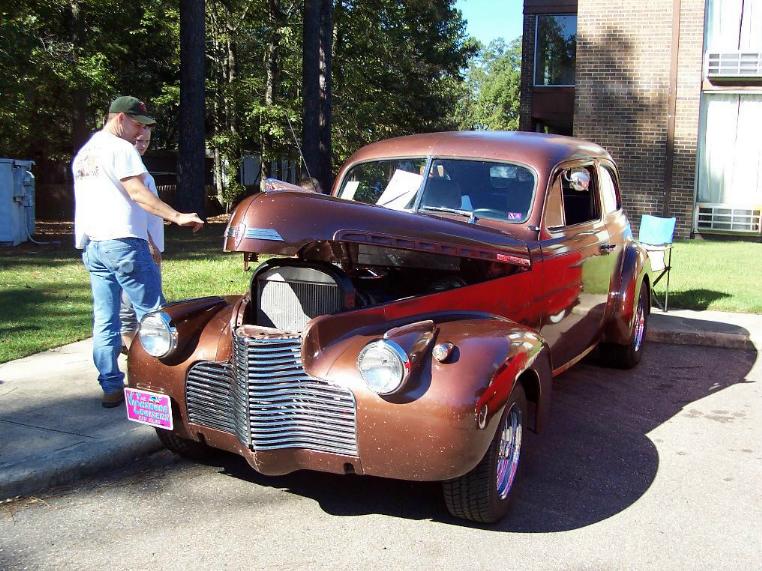
This is what I started out with. The body has some minor dents in it that you can't see in this picture. I hope to drive this car to Louisville, KY in August, 2002 to the National Street Rod Association's Street Rod Nationals. That will come after a lot of work (and learning on my part) and a lot of help from my car club friends. Well, it did not make it to Louisville in 2002.
Here we go with the teardown.
Here it is with the front cap off.
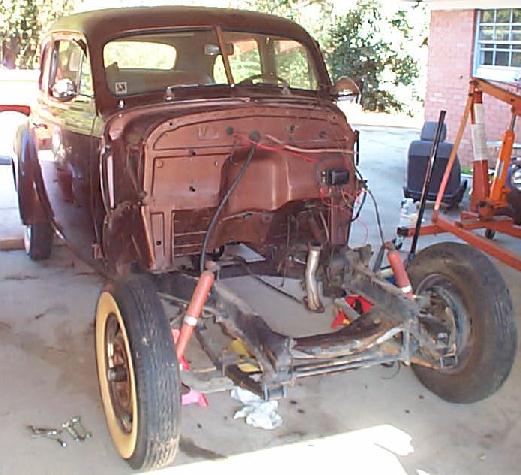
Then we took the old motor out.
I went to the NSRA Nationals in Louisville, KY back in August,2000 and had a great time. Spent way too much money, but that's
part of it. I bought a new 350 V8, seat belts, new springs for the hood, third brake light, stainless steel bolt kit for the new motor, wiring
harness, set of VDO gauges, aluminum dash plate to mount the gauges in, and a 1940 shop manual. Then I received from a friend a set of rear
fenders and running boards for free. The rear fenders have 1959 Cadillac tail lights in them and part of the "free" of them was that I must leave
the tail lights in them. That's OK with me. I went to a junk yard that the club visits once a year and found a set of bucket seats that came
out of a 1994 Mazda Protégé. You can see one of the seats in the right side of
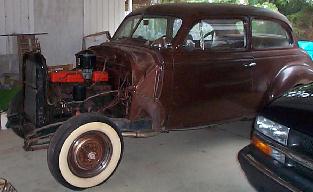
the above picture. It's coming along slowly. I bought a Fatman
Mustang II IFS for the project. I will probably go with a radiator from Afco. The car has been fun to have and I have been learning a lot about it. I
plan on getting the car in running condition and drive it for a little bit until I get it painted.

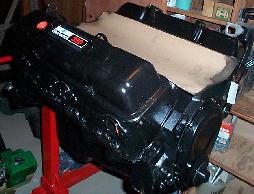
Old motor on the left and the fresh NEW 350 V8 on the right just waiting to go in the Sedan.
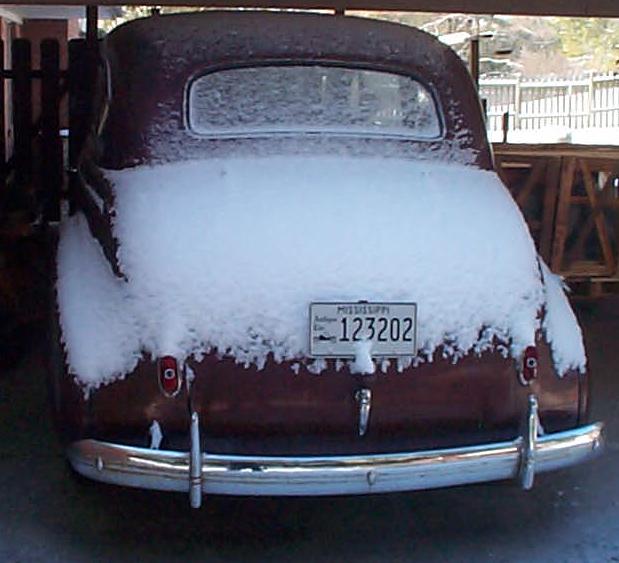
The weather was hot in August, 2000 with temps over 100. Then in late December, several ice storms moved by Mississippi and I knew that one was going to hit us soon. On the last day of the year, December 31st, it started snowing in Vicksburg, MS. So on January 1st, 2001, I went out and took some pictures with my digital camera.
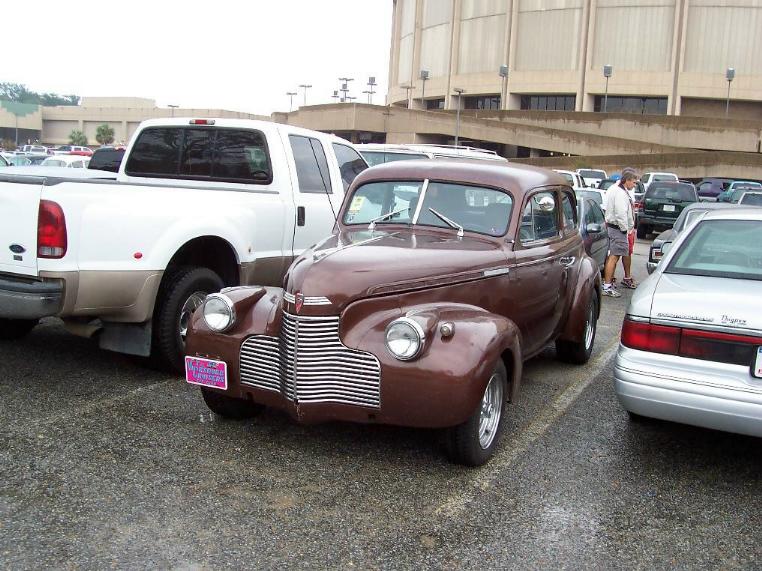
Here's my car:
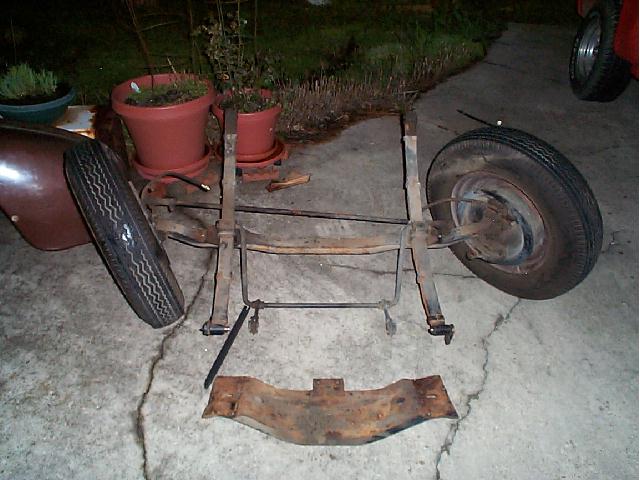
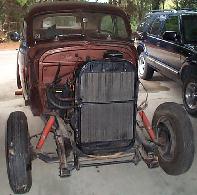
Out with the old, in with the new.
(front end that is)
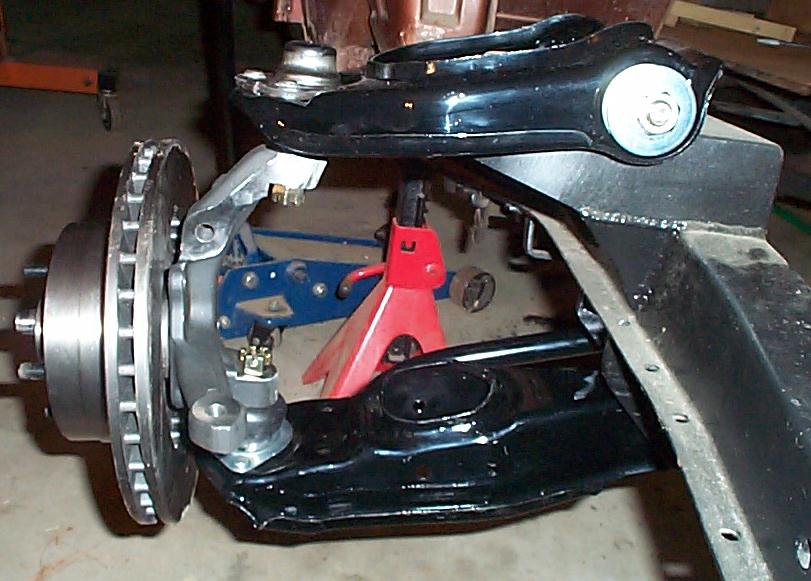
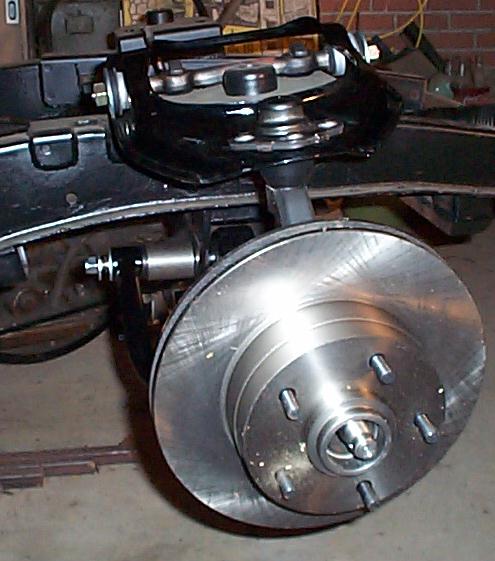
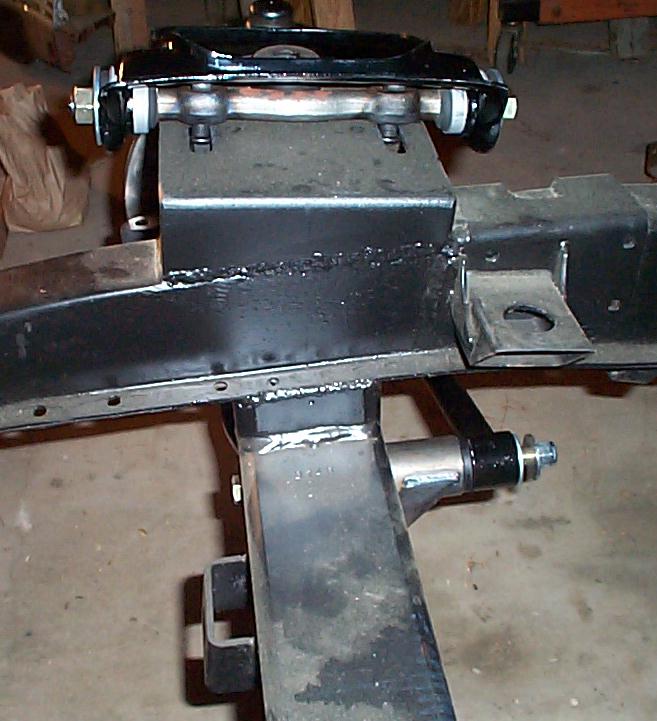
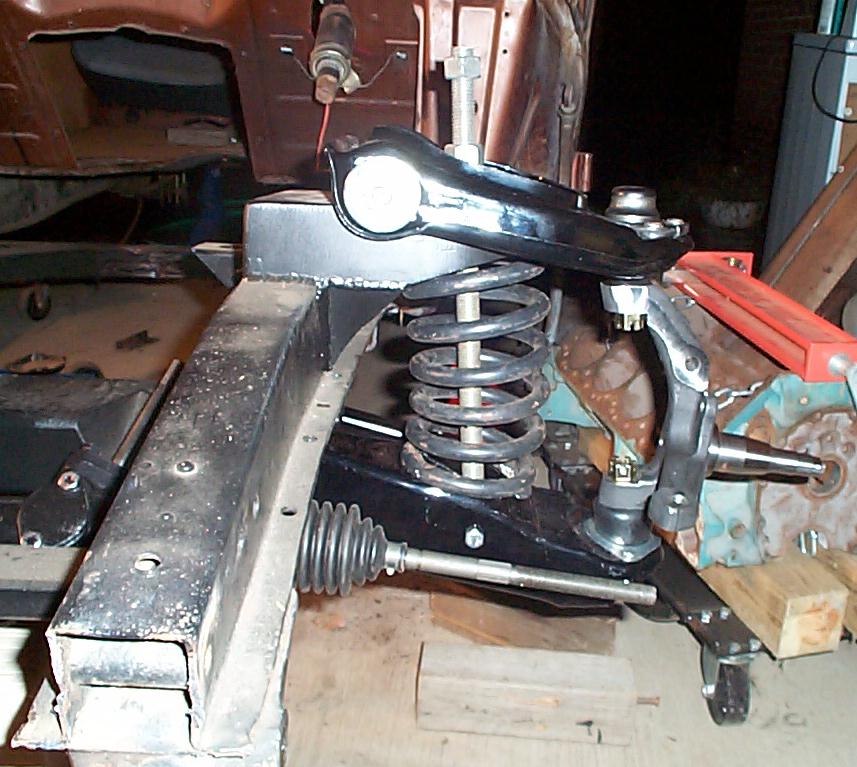
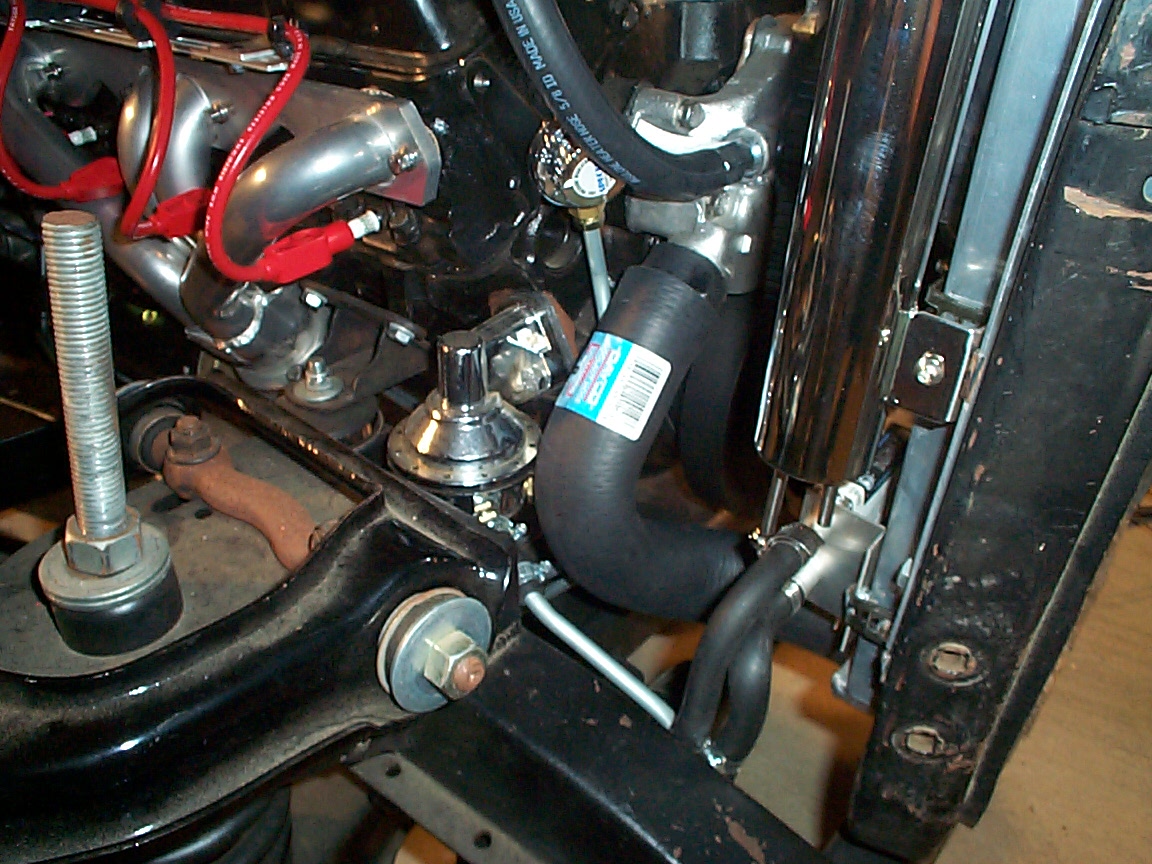
Below are two pictures of the new Fatman Mustang II front end
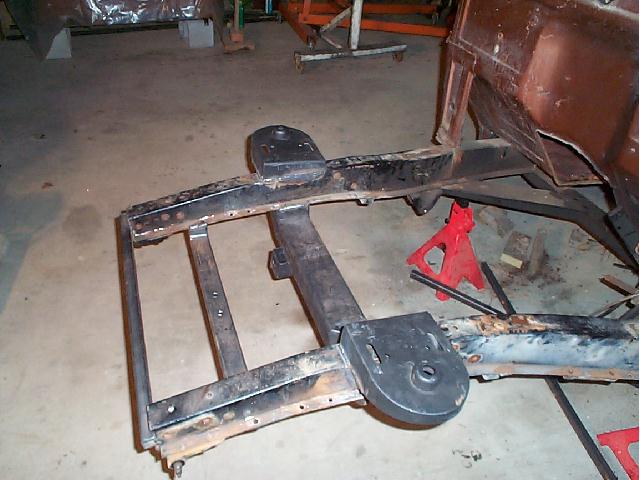
The extra piece of steel (across the front) will come off after the finish welding has been done. It was just added to make sure the frame rails stayed true while there was no front end under the car.
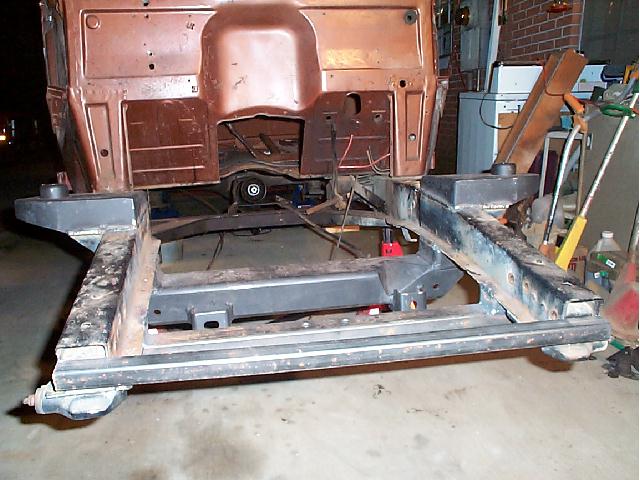
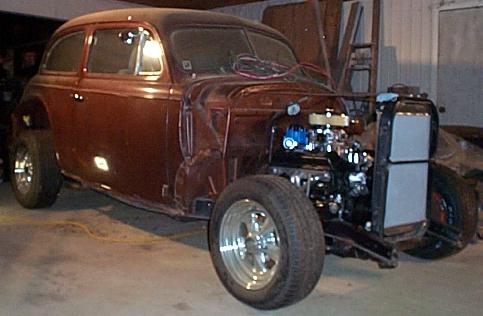
Now the Sedan has about a 1972 Nova rear end under it. I purchased a mounting kit from Butch's Rod Shop.
Well, I promised more parts for the car from the NSRA Street Rod Nationals in Louisville that was during the first week in August, 2001. I said that when I got back it would be time to bolt on some more parts. What happened was that I bought just enough parts that I needed more parts in order to bolt those I bought onto the car. I purchased most of the rest of the front suspension parts this year and a transmission mounting plate from Chassis Engineering. Instead of going with stock Mustang II strut rods, I did the same as a friend of mine did on his, I bought the No-Bind Strut Rods from www.fulltiltstreetrods.com and below are some pictures of some of those parts going together:
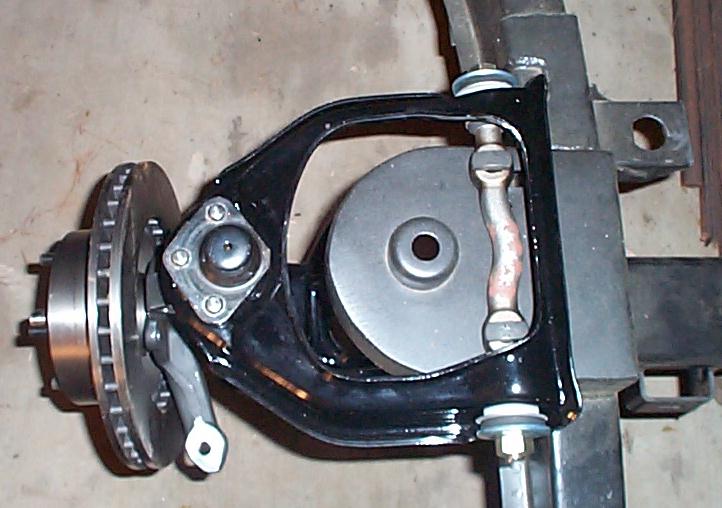
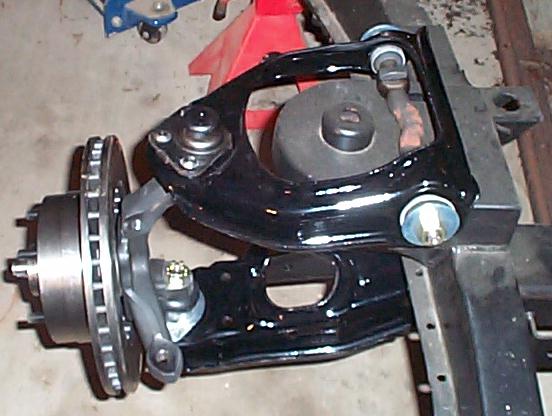
These pictures have the parts just lightly bolted together just to give you an idea of what it's going to look like and it will have springs and shocks.
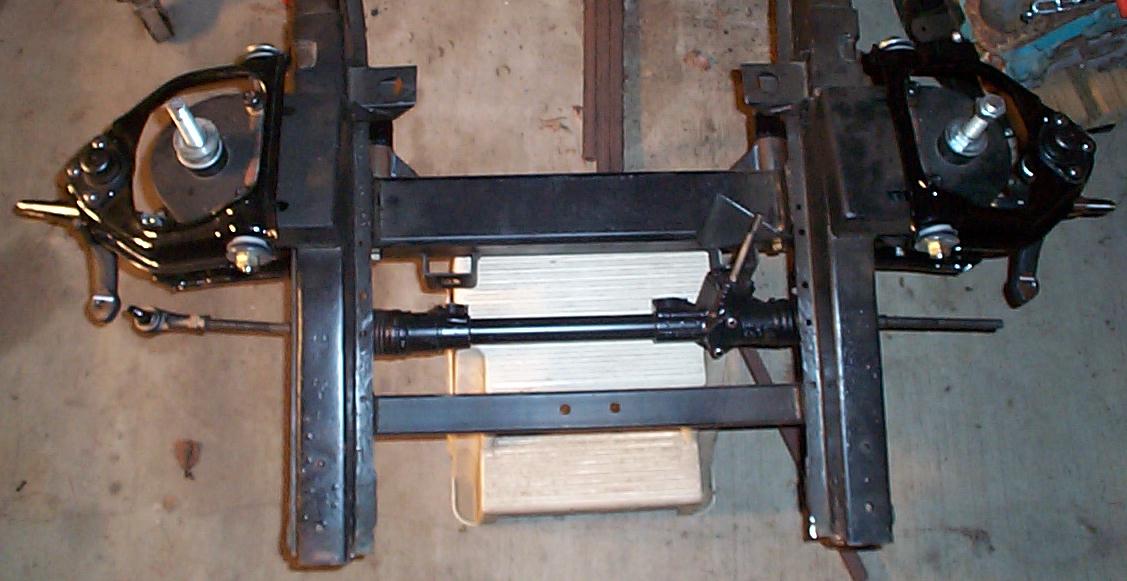
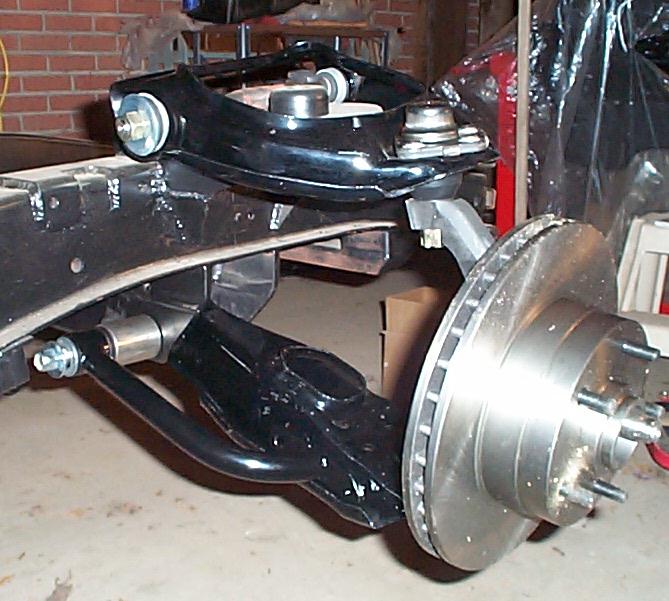
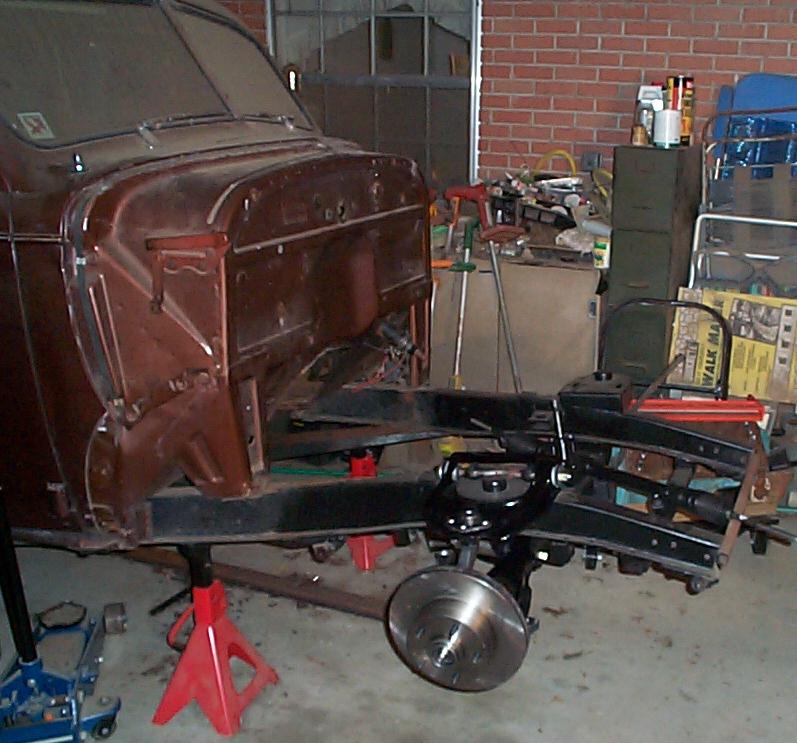
Now I've got the springs in place and I have the 1974 Mustang II manual rack sitting there waiting on the rack bushings so it can be installed. I have also removed the extra piece of steel that was on the front to hold the frame rails straight while the old front end was taken off and the new Fatman front crossmember was welded in place.
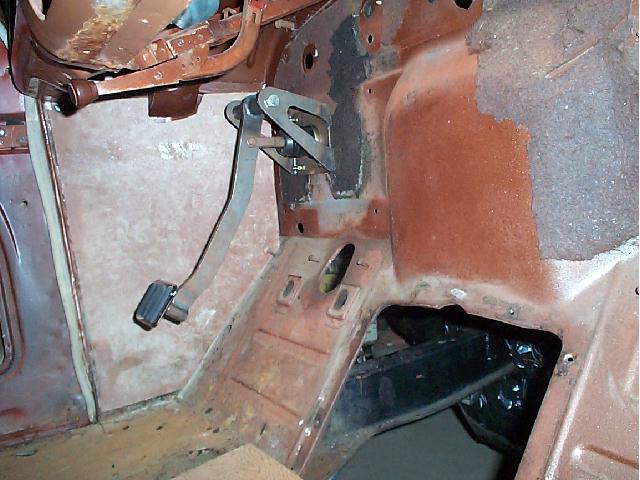
Now, I have the brake pedal mounted and am starting to mount the master cylinder & booster.
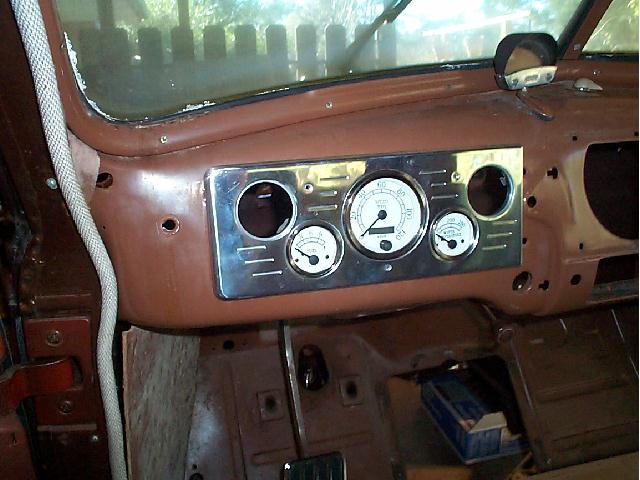
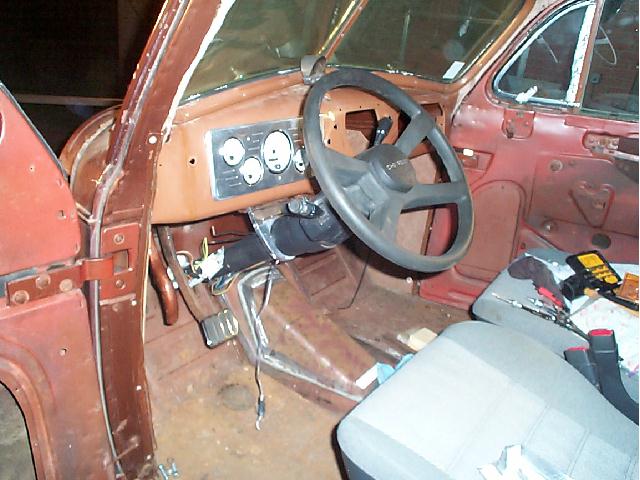
I put the gages in.
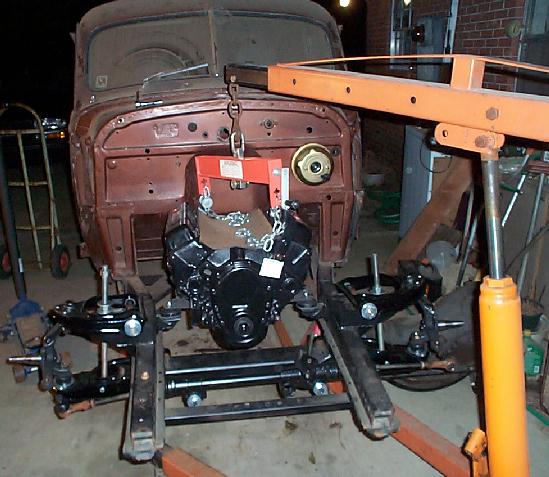
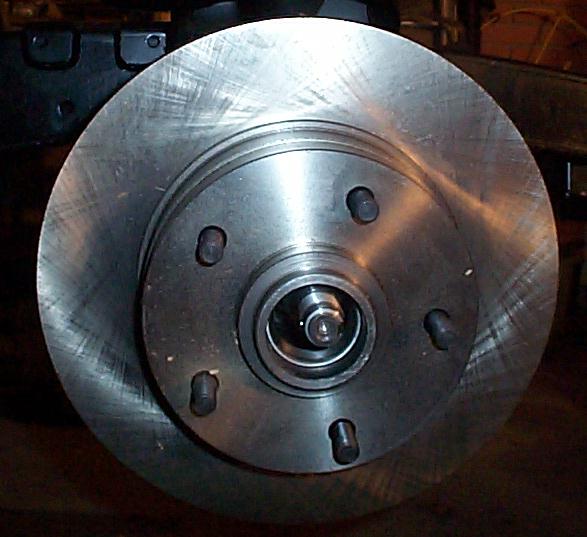
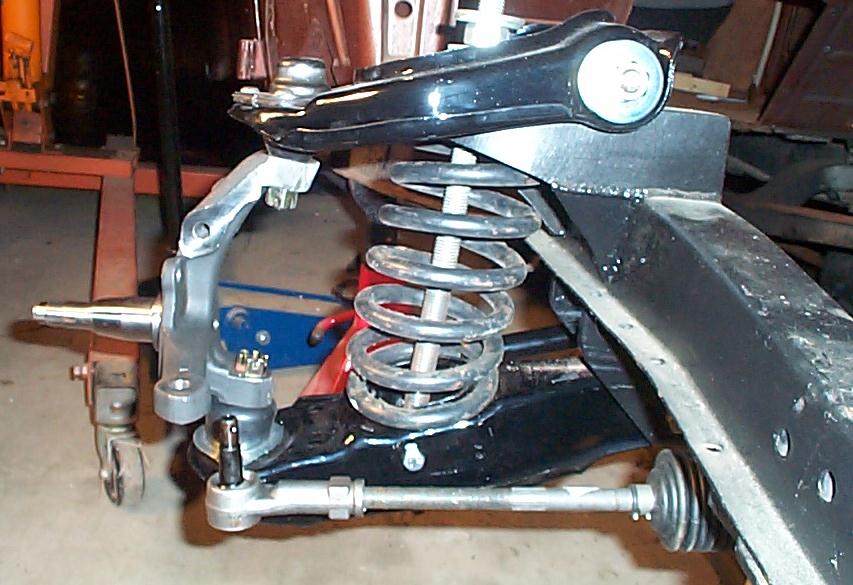
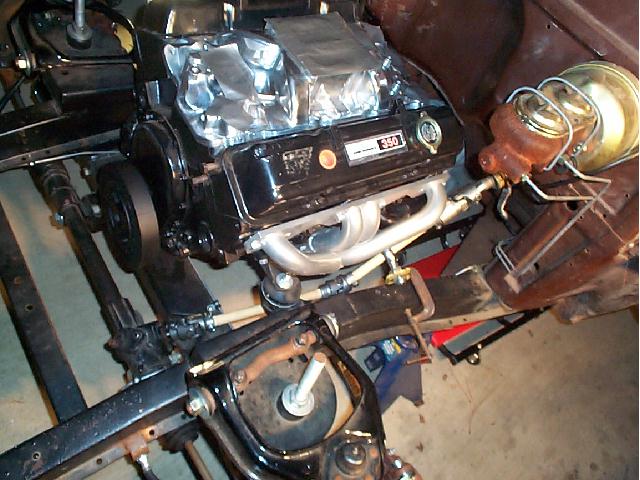
I also dropped the new 350 over in there to see how it is going to look. I have new springs from a 1974 Mustang II and stock shocks for the front end yet to go on. I purchased my calipers & brackets the other day. I also purchased the brake plumbing from Street Rods By Michael http://www.srbymichael.com/ and soon will run those. Make sure to visit the Street Rods By Michael site as they can help you out with several brands and they have always treated me good. We tore into the Nova rear end the other day and found that I needed new axles. A friend of mine asked another friend if he knew where some were and he happened to have two Nova rear ends at his place, so I was able to get two axles that were in better shape than the ones I had. Then I purchased new roller bearings and seals to mount the axles back in there. I also have the rear brake kits to install.
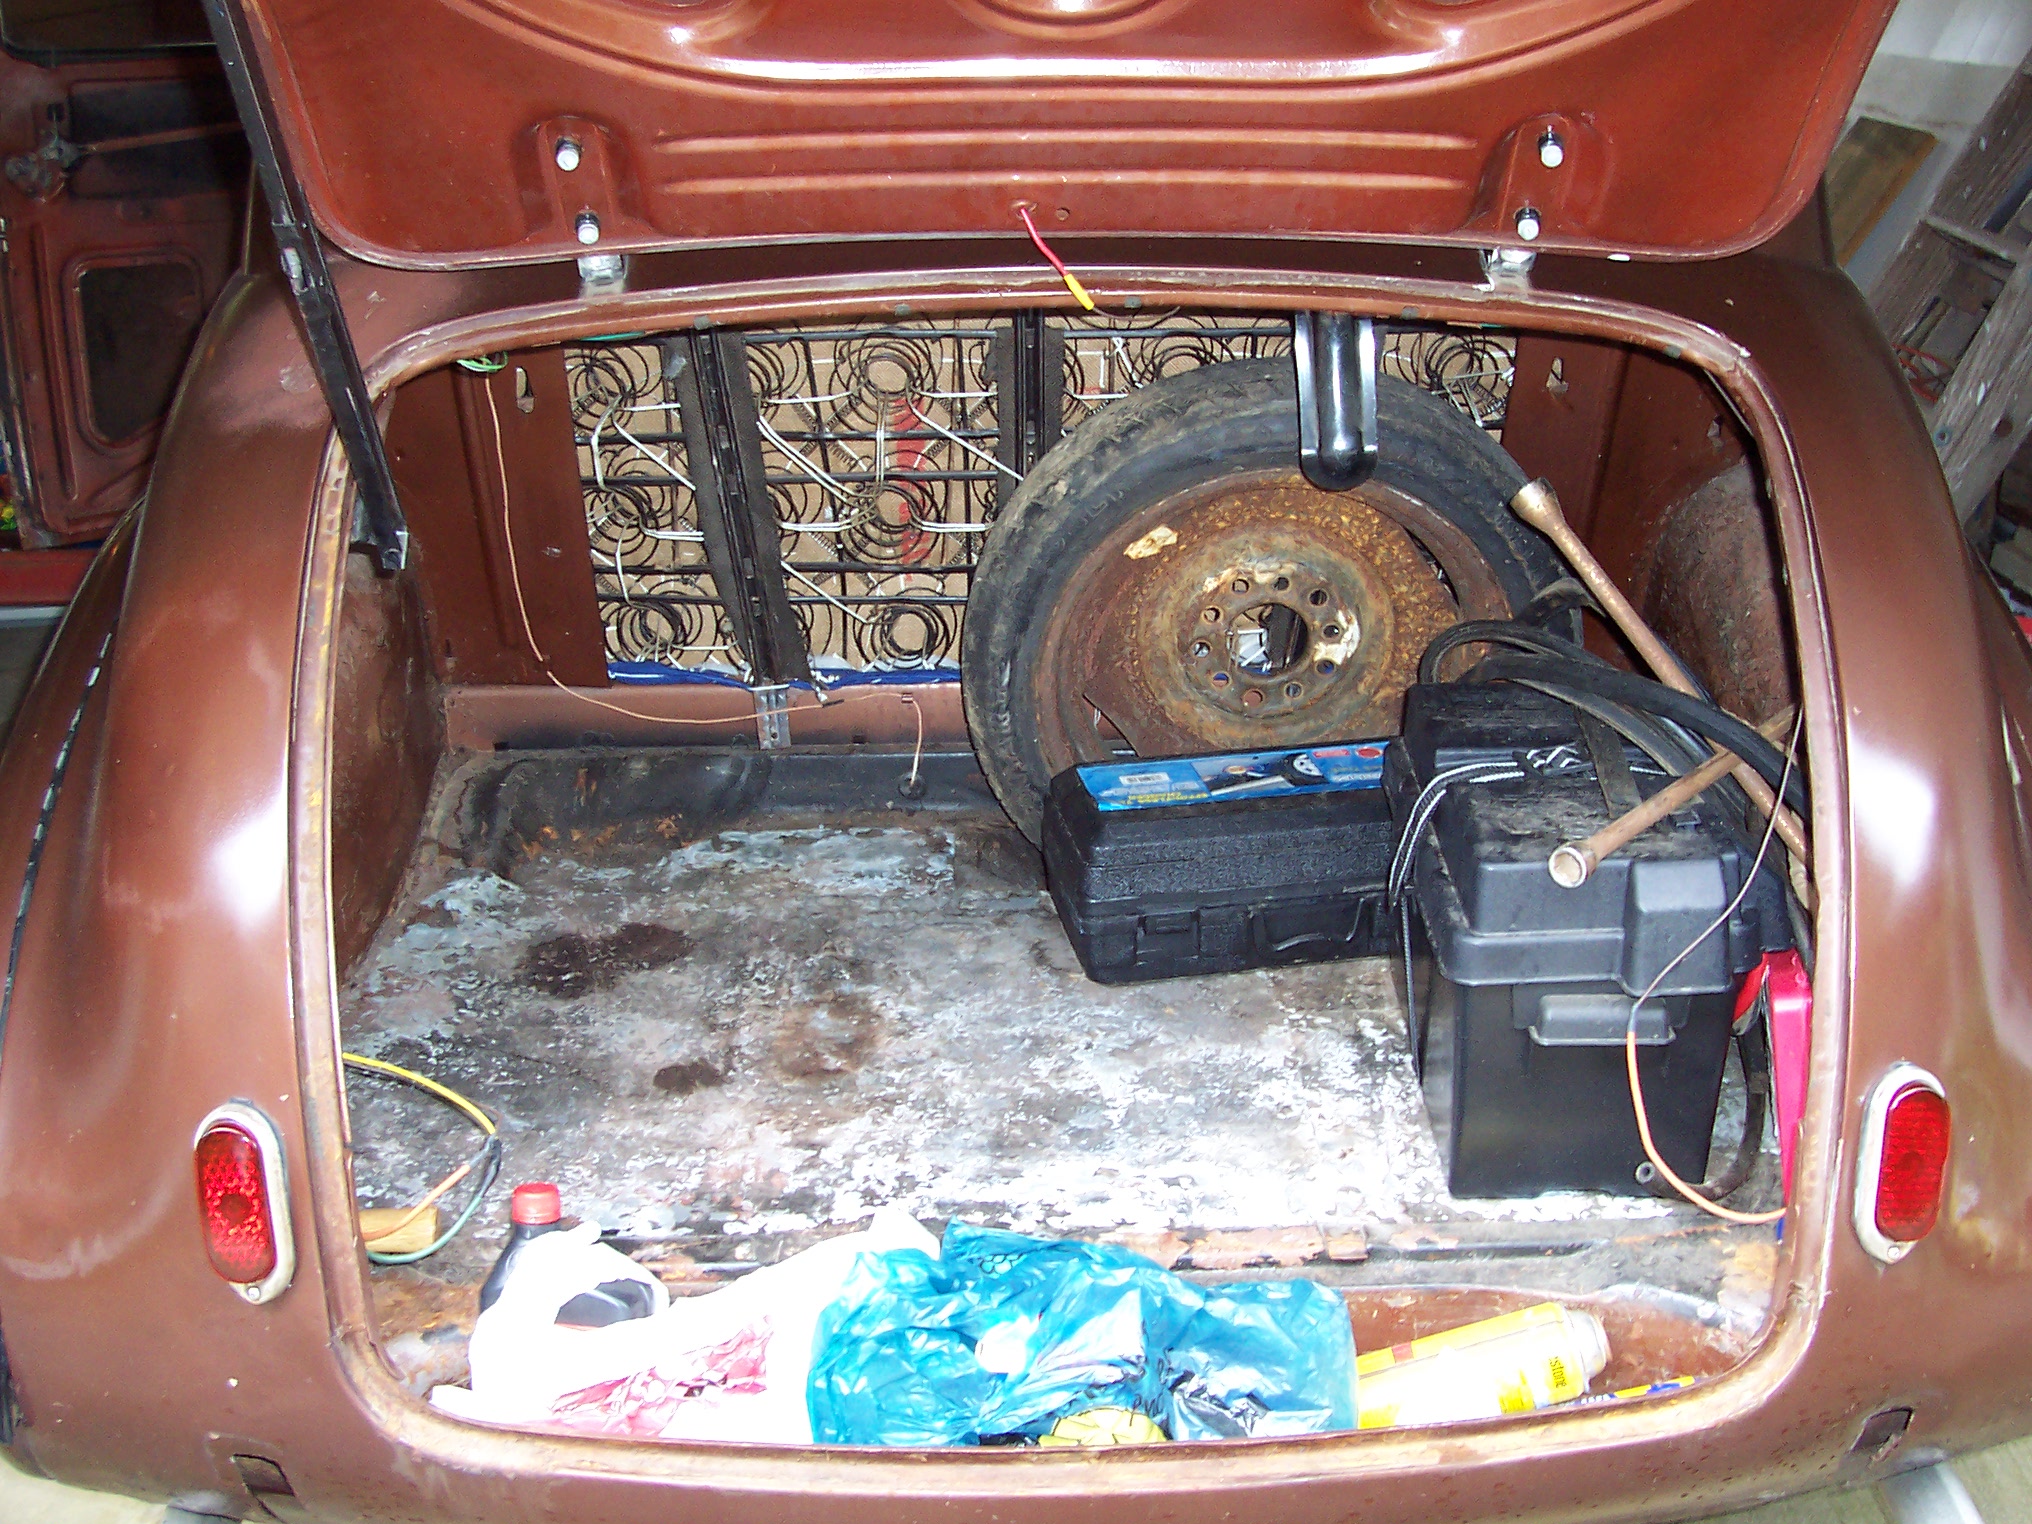
The rear brakes are installed. I bought some Cragar SS wheels for the project and then purchased some 235/70-R15 tires for the rear and 215/60-R15 tires for the front. Now I will have to get different (wider) rear fenders because the size of the rear wheels & tires. The rear wheel size is 15 x 8 with 4 1/4 backspacing and for the front I have 15 x 7 with 4 1/8 backspacing. I bought the Cragars from Summit Racing (www.summitracing.com). Here's an updated picture with part of the brake lines ran, new poly gas tank (from Tanks, etc.) installed, seat frames welded together, and the emergency brake cables almost installed all the way. Those cables are from Lokar and they allow me to use my original brake handle.
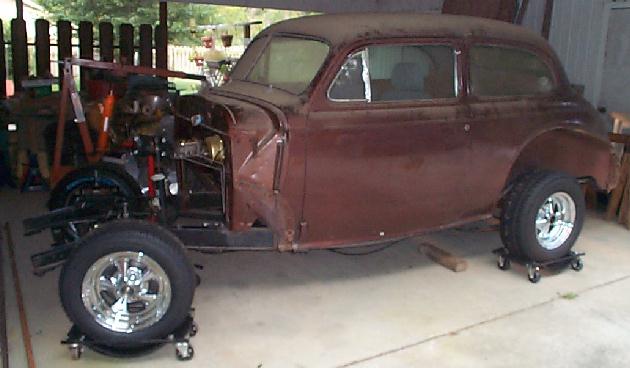
The car dollies are from Summit also. Harbor Freight has them also. Several other companies sell them also. They are great to have in the shop. I used them to haul motors, transmissions, and other items around. I finally got a chance to use them for what I bought them for. With them under the car, one person can move the car any direction...that is after you get all of the wheels going the same direction. Right now, I have got to go get ready as I am finishing my shopping list for Louisville '02.
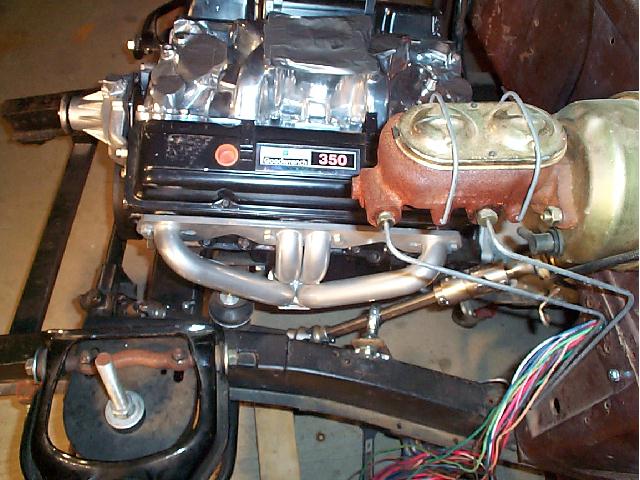
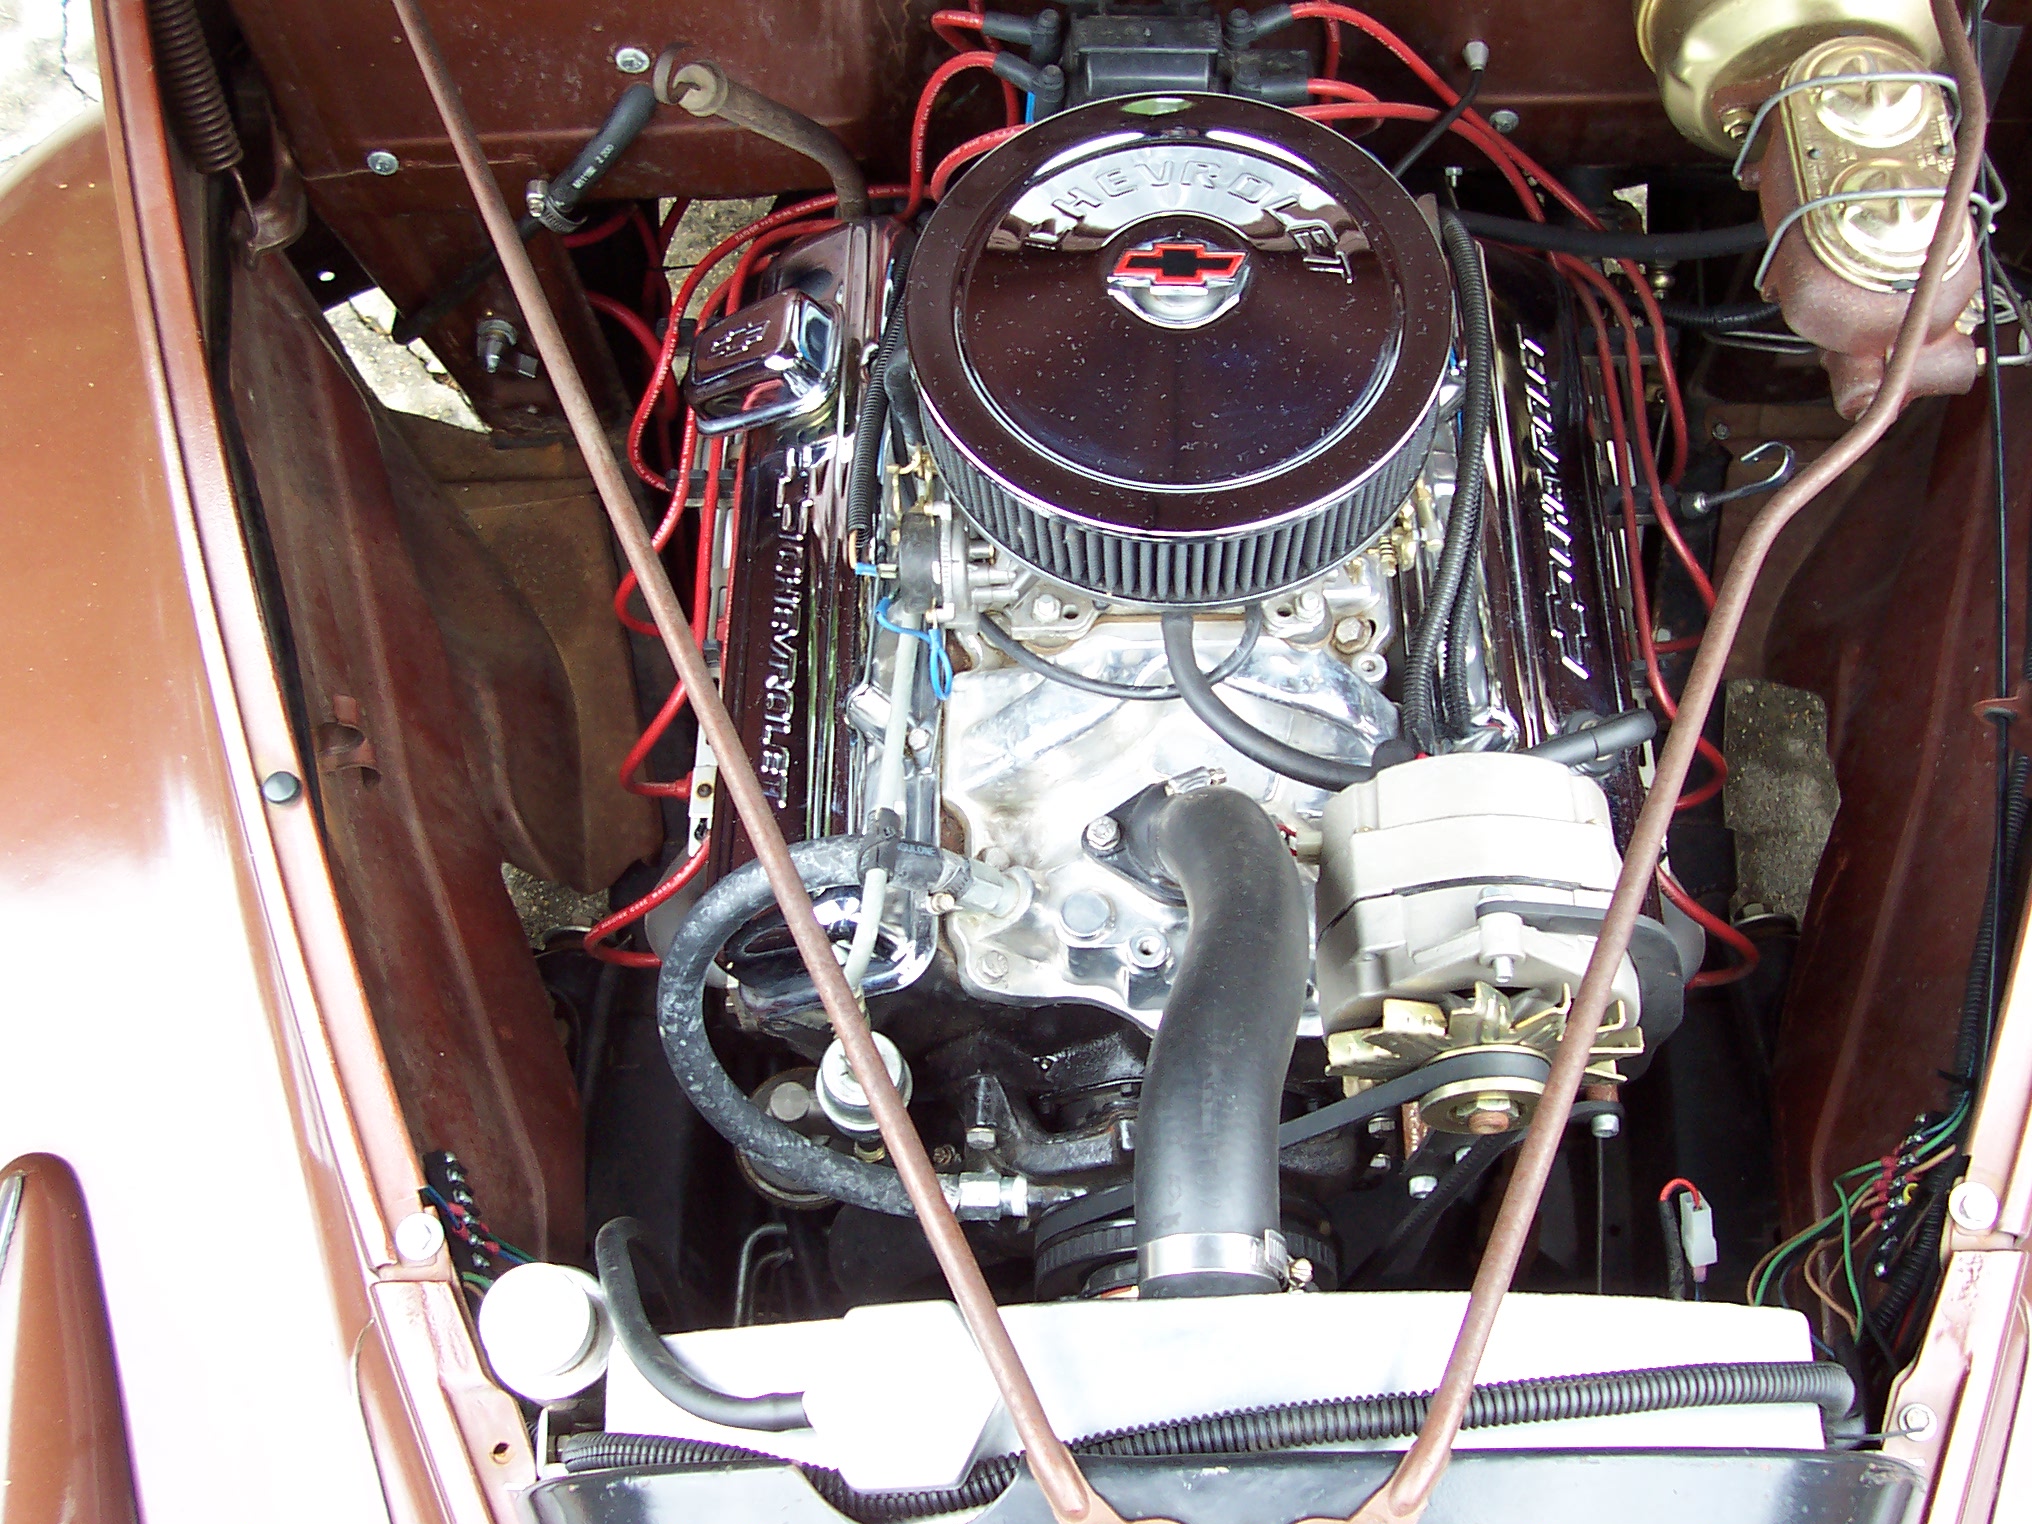
It's been a while since I have updated this page, so let me get you caught up on where the project stands now. The motor & transmission (a turbo 350 automatic) are in the car to stay for a while. I got the GM column in place and I'm fitting up the u-joints and such for the rest of the steering linkage. The brake pedal has been braced, the emergency brake cables are now finished. Before the motor went in this time, I ran the fuel line down the passenger side frame rail. I bought a set of Sanderson headers from a friend of mine that could not use them on his project. They are going to work great here on this one. I've got some 1" long stainless steel header bolts to use. The brake lines were ran.
I need to purchase a yoke for the transmission and I can measure for a drive shaft. Then I will start putting in the wiring harness and will be getting closer to cruisin'.
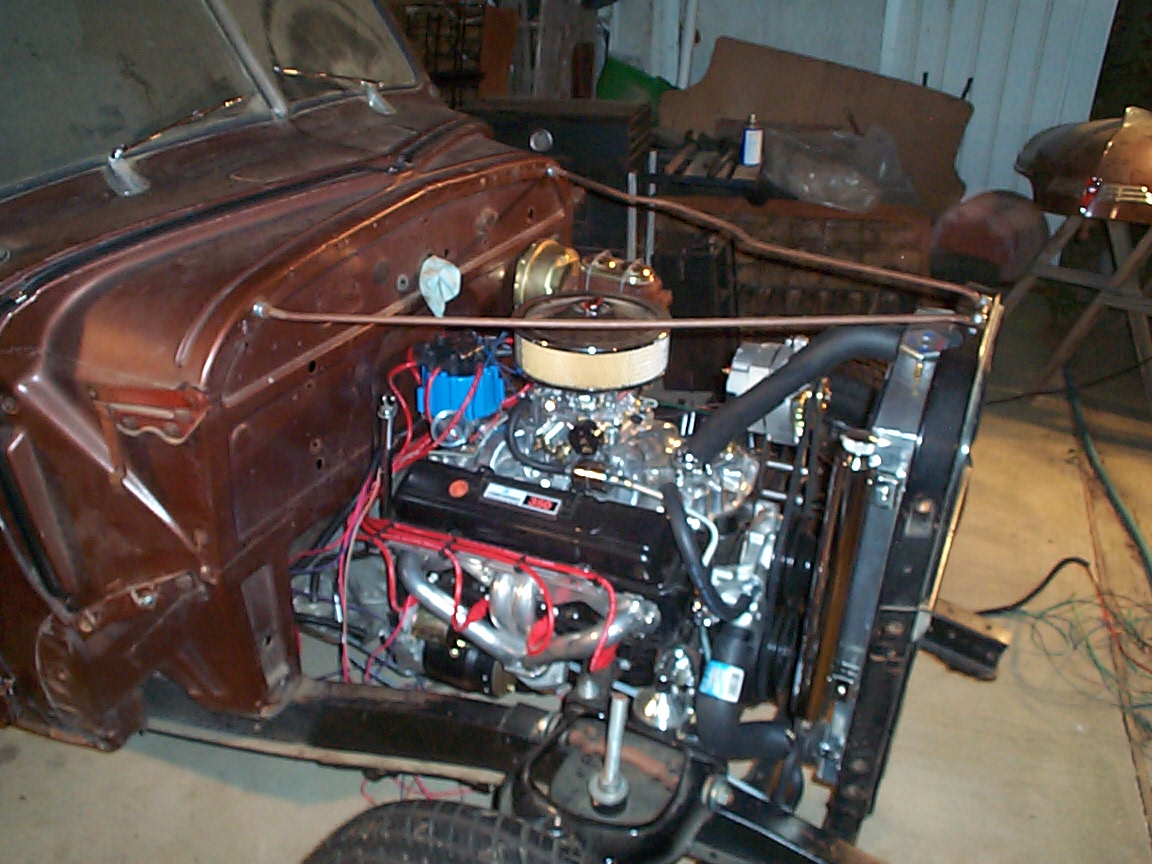
The harmonic balancer is in place and the steering is being mocked up. We've used 3/4" wooden dowels to take the place of the real thing (3/4" Double-D rod). Now that the route (under the motor mount, instead of above like the first choice was) has been established, the length of the rod is known. We cleared the Sanderson headers also by going this way. I've started laying out the wiring harness (Haywire) and I'm deciding on a location to mount the fuse block. The rest of the steering linkage consist of the following: 3 Borgeson universal joints (one of them is a combination u-joint/vibration dampener); a stand off that will be mounted to the frame. I've covered the holes in the intake manifold with duct tape to make sure nuts and bolts & creatures don't find their way in there.
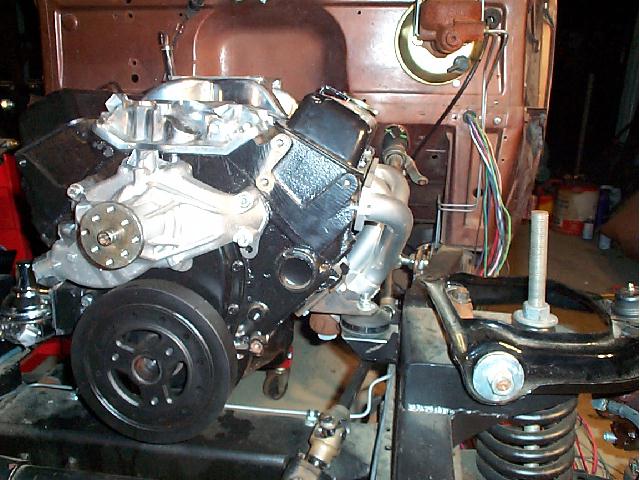
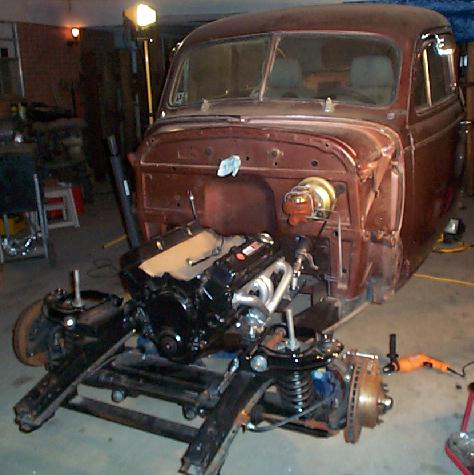
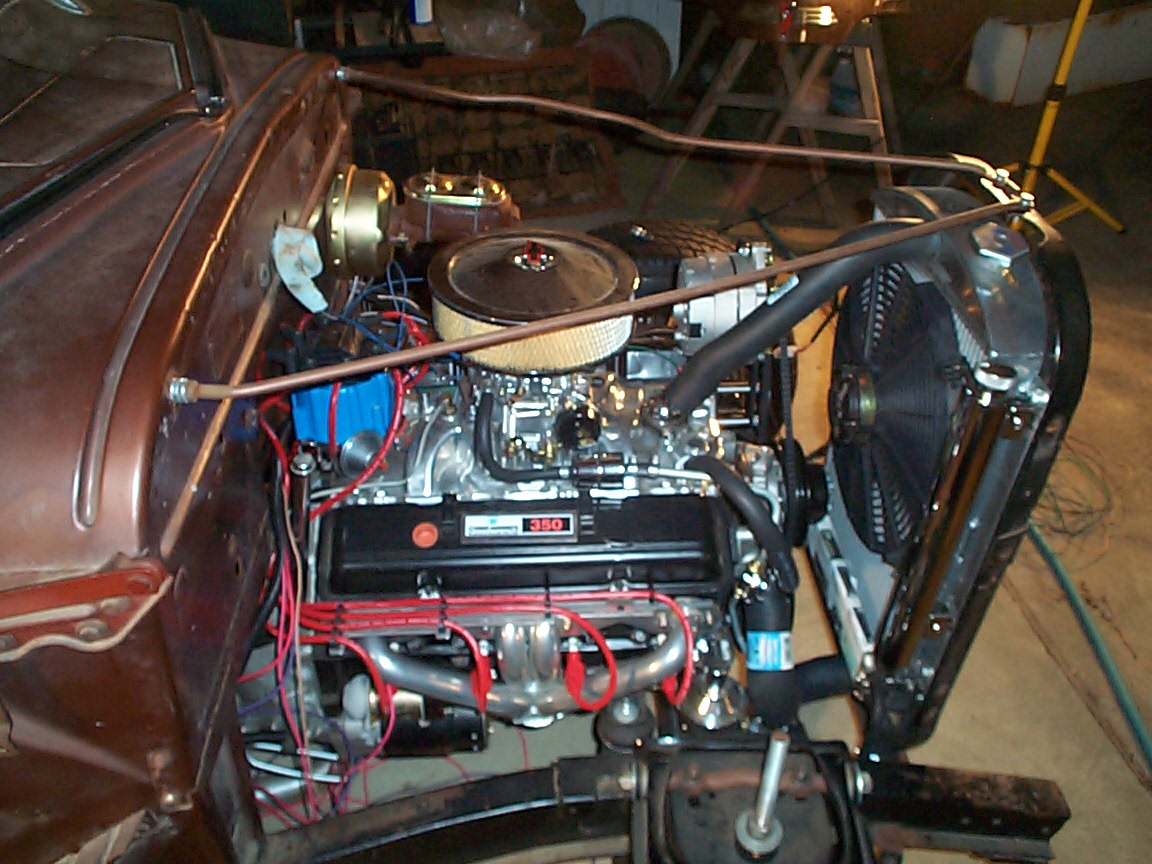
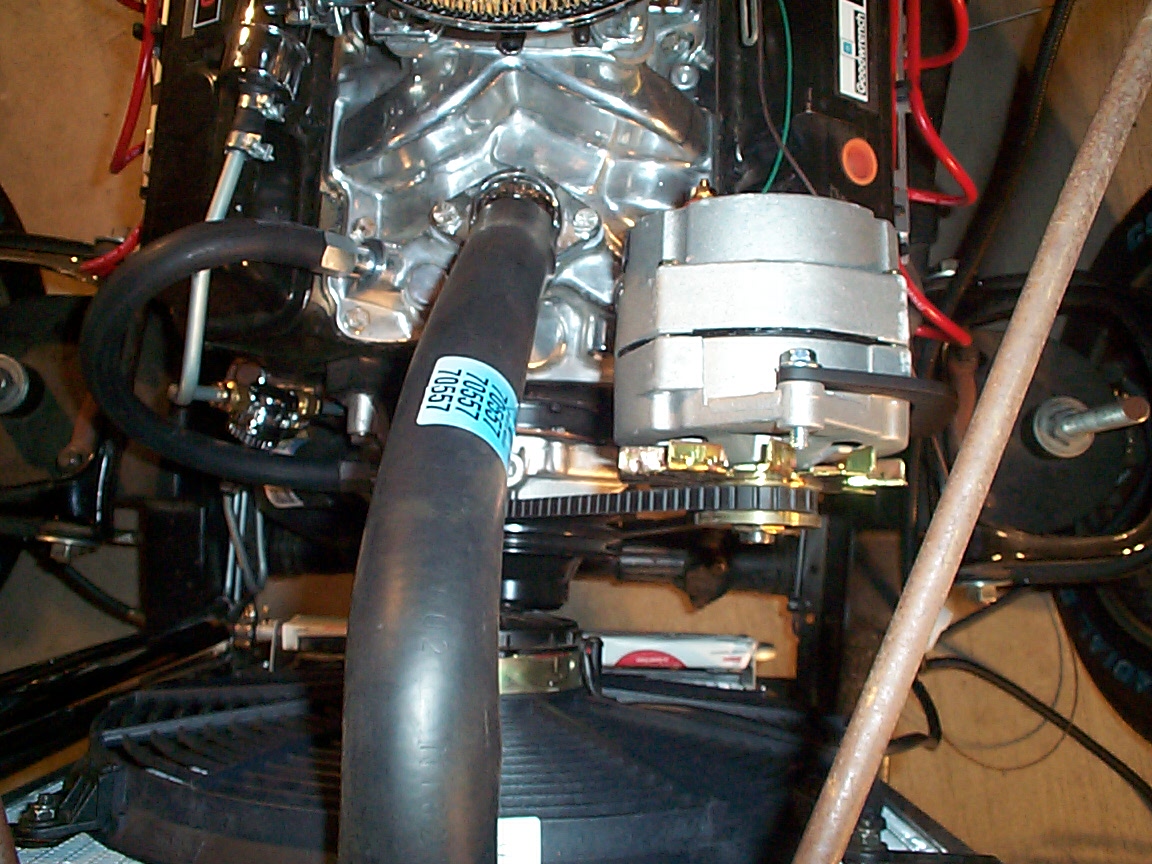
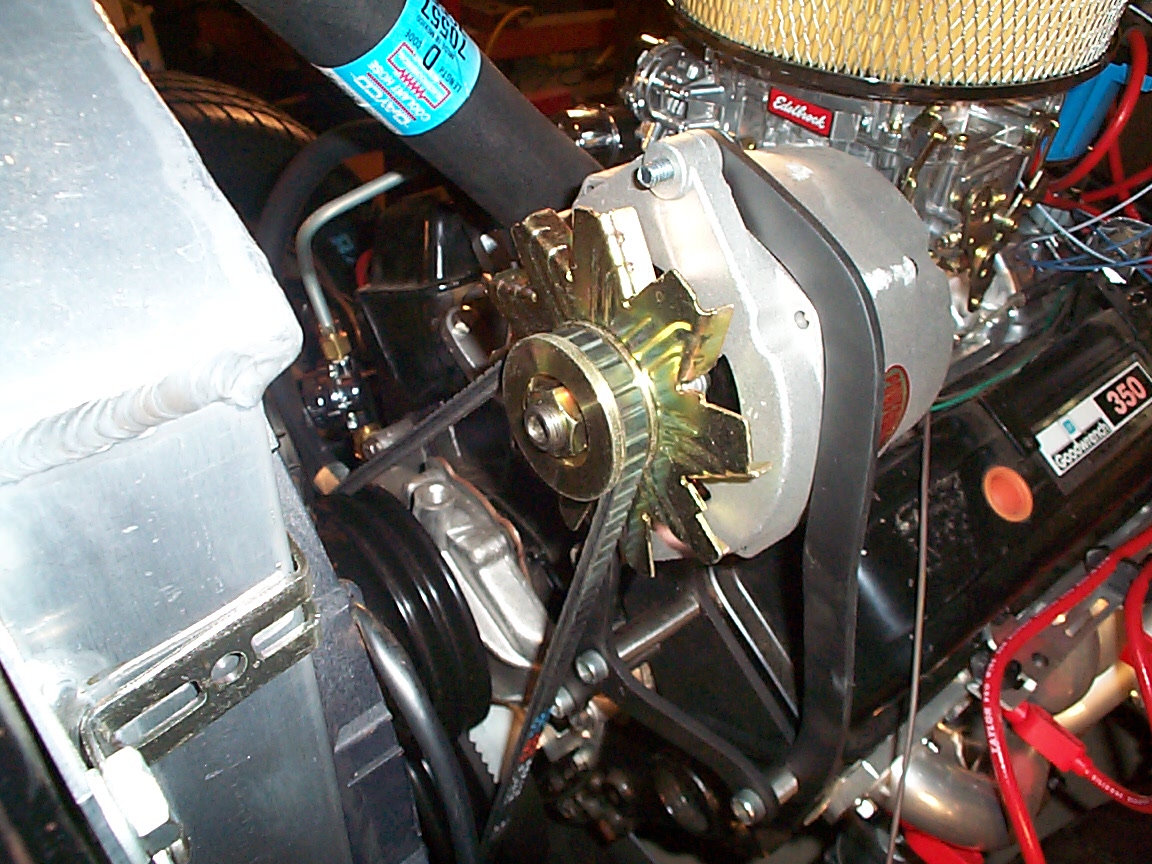
The motor is starting to come together with the intake manifold, fuel pump, & water pump in place. The steering linkage has been installed now also. As you can see on the top, right side of this picture, the wiring is being installed. Here is another angle:
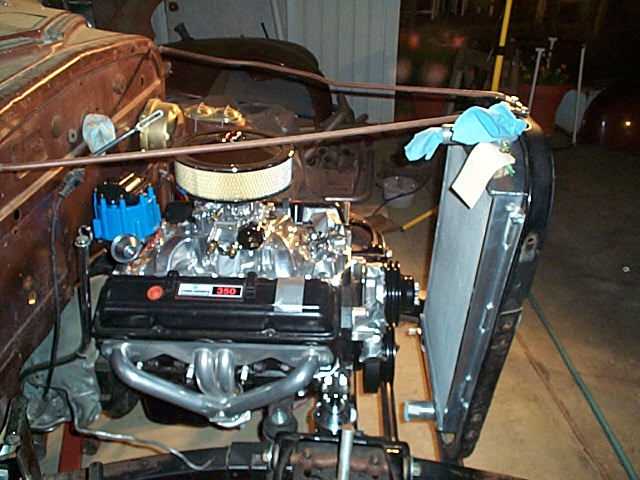
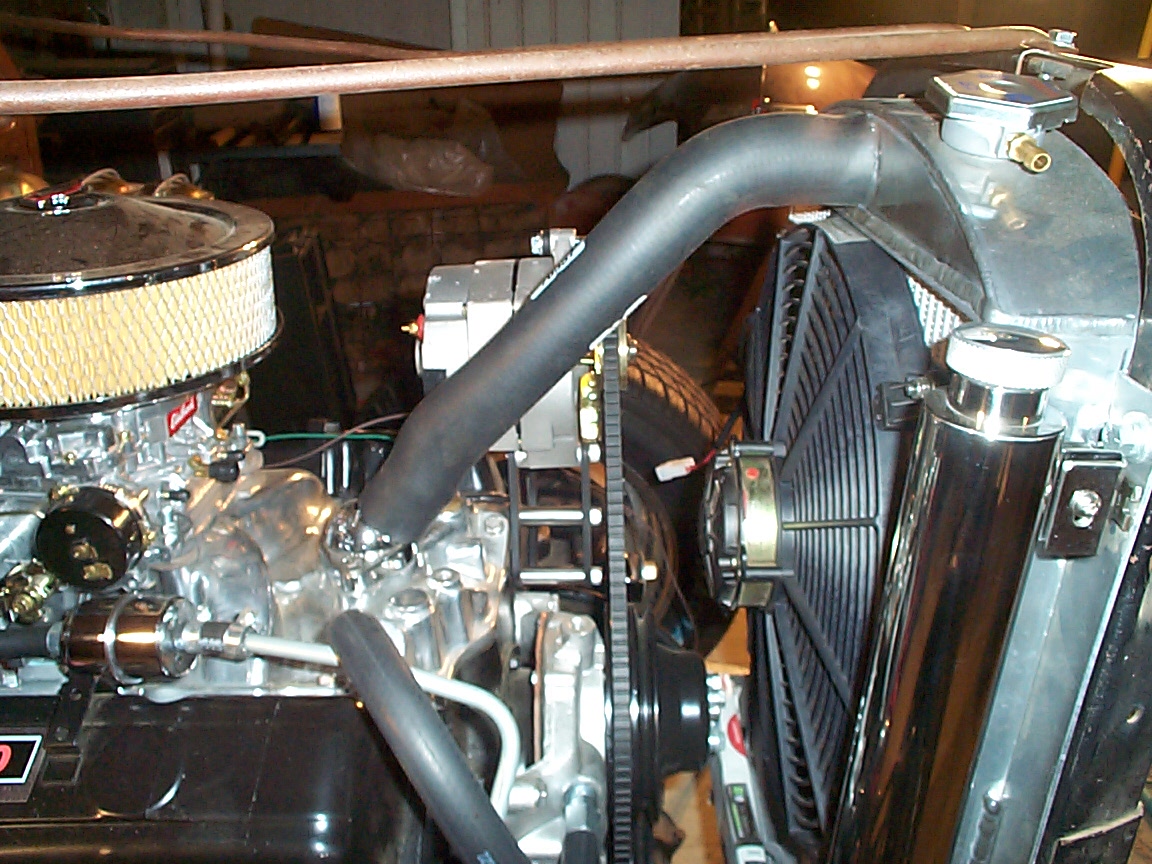
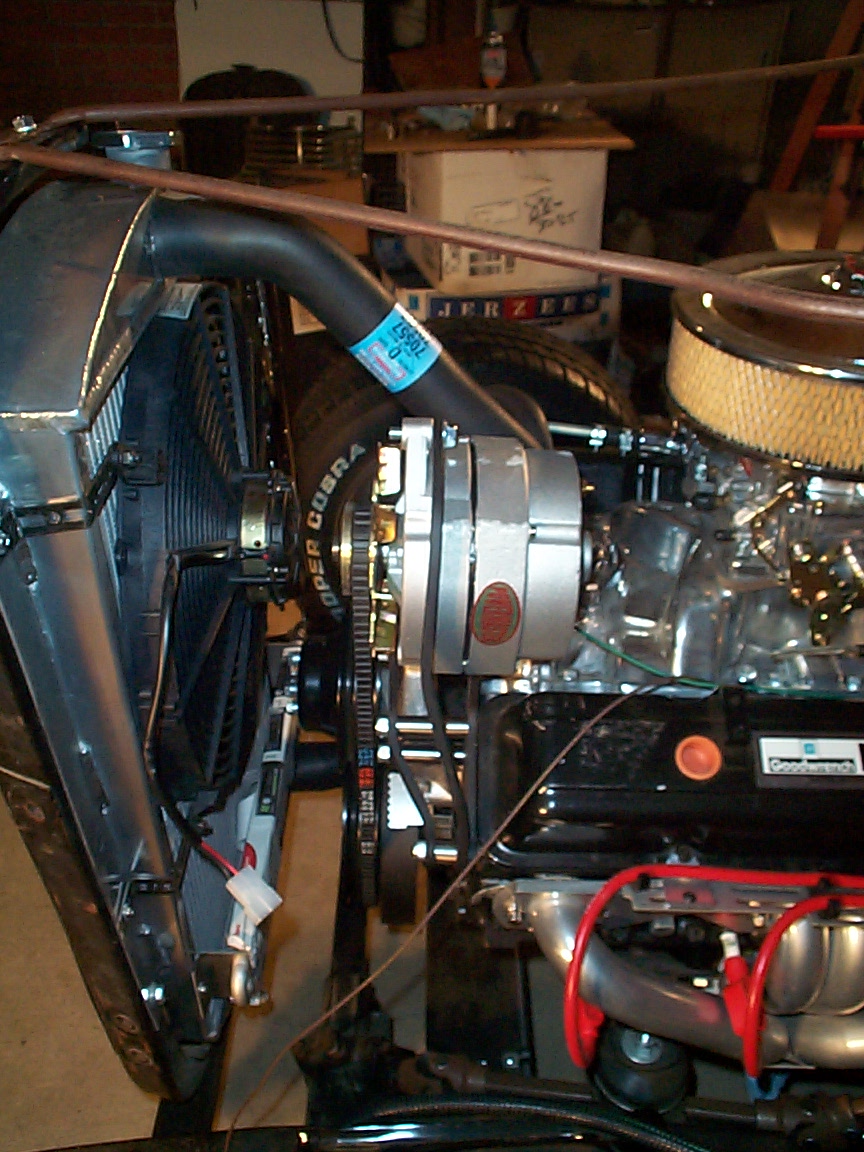
These two pictures show the new Afco radiator mounted in the shell. I will be adding the Spal electric fan soon to the back side of the radiator (between the radiator and the motor). Also you can see that the distributor is in. It will have to come back out to pre-oil the motor so right now it's just lined up where it will go. I will begin to put on the Taylor spark plug wires while the distributor is where it belongs. Getting closer to cranking time. I will go this week and get some work done on a drive shaft since I know what length I will need it cut down to (49 1/2" center of u-joint to center of u-joint). I have purchased the yoke for the transmission.
I finished installing the rear sway bar and rear shocks, then I put the tires and wheels back on and dropped it down to see what the ride height was going to look like and I liked what I saw. It may go down more in the back because the gas tank is empty and the rear seats are not in yet. I then put the drive shaft in and it fit fine.
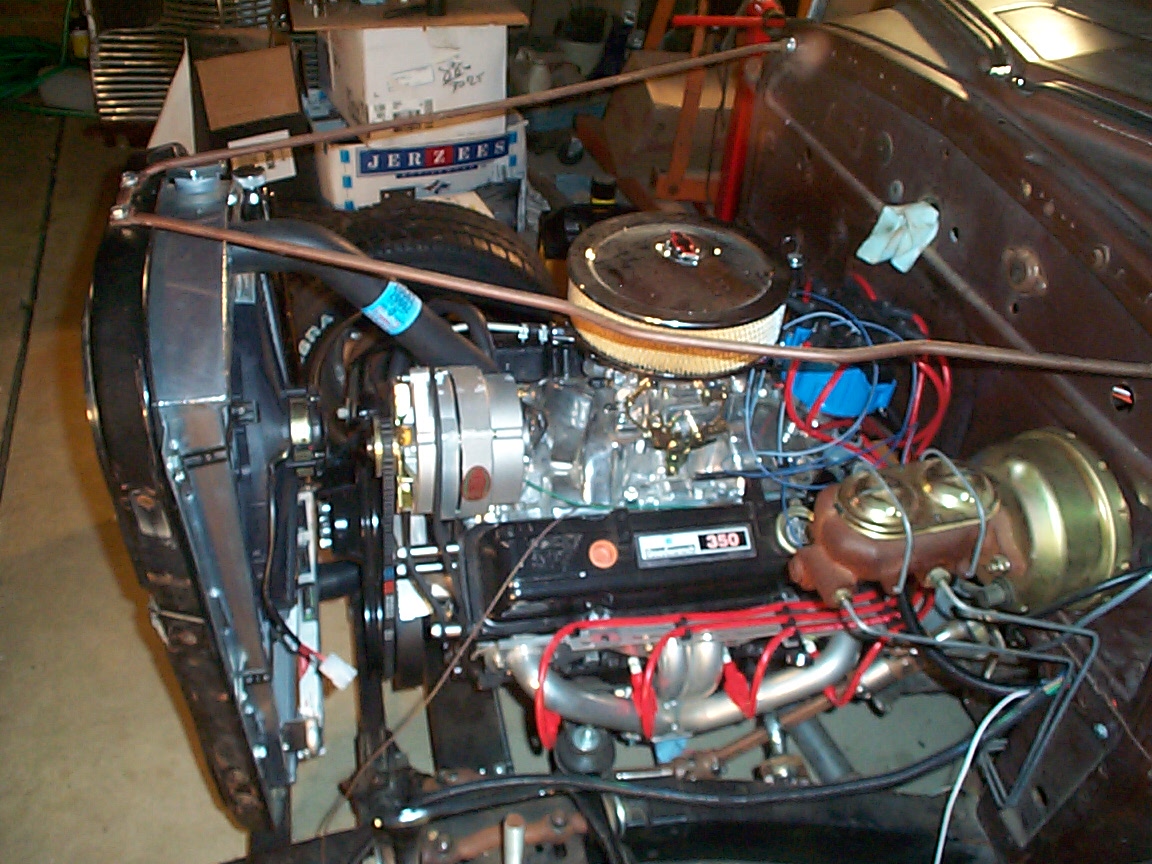
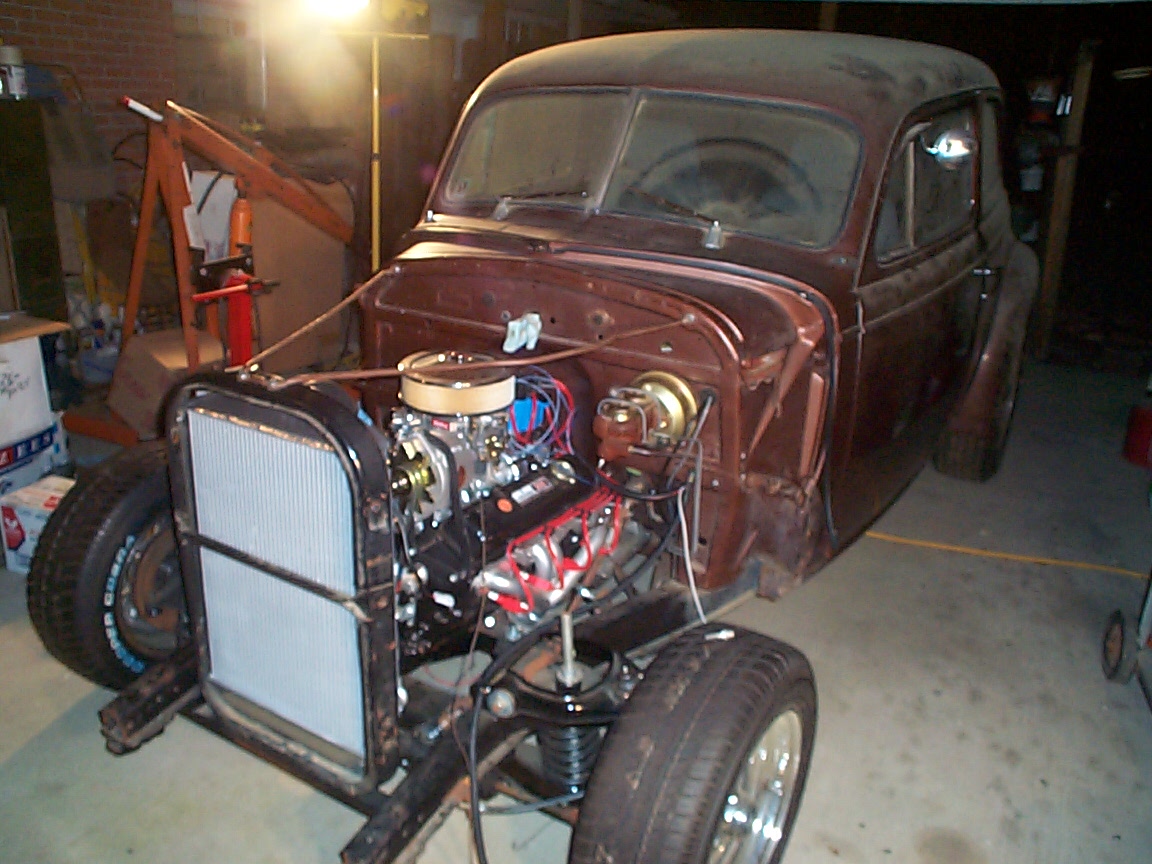
Now I'm starting to close in on Cranking Day (June 23, 2003) as you can see in the above pictures. The wiring is done for the motor and most of the under dash wiring has been done. The electric fan (Spal) has been installed all the way. I decided to mount the battery in the trunk using a kit I bought from www.summitracing.com and it worked out pretty good. I was trying to save space up front for a future a/c unit. In getting ready for the cranking party, I installed the throttle cable, shifter linkage, ran the battery cables, worked on a temporary fix for a gas filler tube so that we can put gas in the tank, and cleaned up the wiring a bit. After Monday night, I shouldn't have to just sit behind the steering wheel and go vroooom, Vrooooom...all I will have to do is turn the key. I will be going and getting the exhaust ran after the cranking and soon will be on the road with it. Counting down to cruising to Louisville, KY to the NSRA Street Rod Nationals July 31-August 3, because this year I'm driving a street rod to it!
The car had a fuel starvation problem when we tried cranking it on June 23rd, but we were able to run it a little. The problem was traced down to the fuel pump and another one was bought to fix it. After that one was installed, the fuel problem was still there. Everything did not go as planned to be able to drive the car onto a trailer to take it and get the exhaust ran, so it had to be pushed onto the trailer. The next morning I hauled it to the local exhaust shop and got that taken care of. A friend donated a pair of mufflers and I had them run 2 1/4" pipes from the Sanderson Headers to the tail pipes. It sounds good with that size pipes. After I got the car back home, I started hunting for the fuel blockage. It had then been traced down to the fuel line. After the fuel line was disconnected, I blew it out with a small air compressor. Something came out, don't know what. Hooked it all back up and cranked it and the problem was solved! The above picture was after about three trips around the block.

Got to finish wiring the headlights and horn and taillights and put the seatbelts in place.
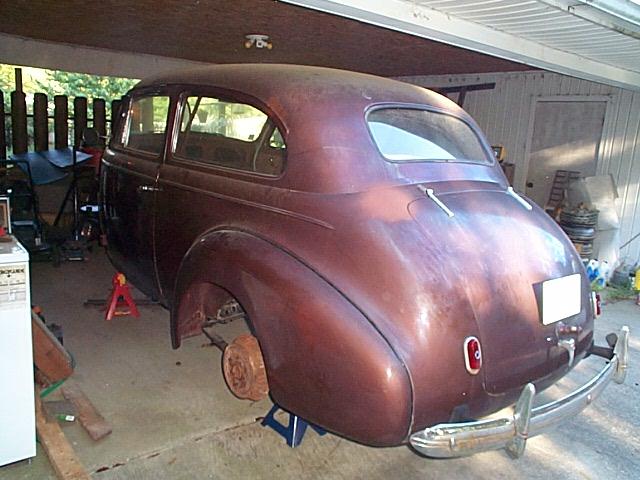
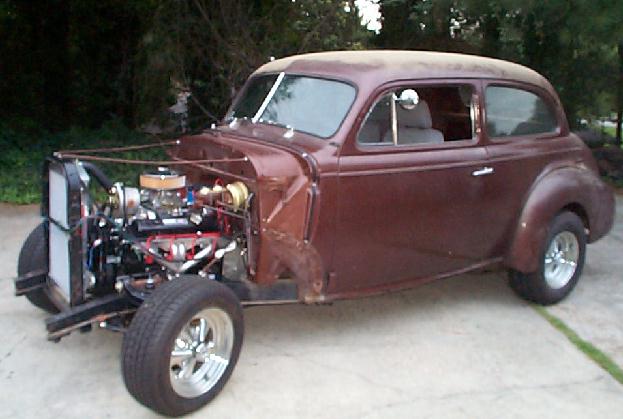
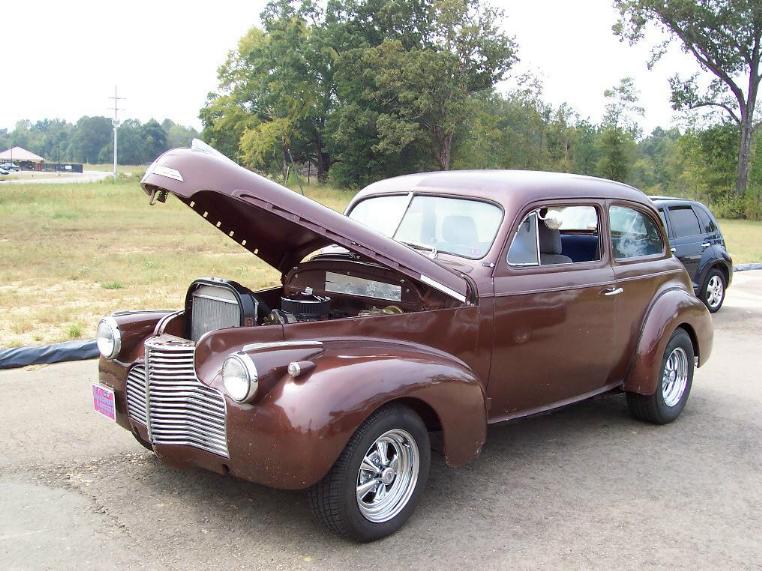
This picture shows the front fenders going back on. The hood is just sitting on the car. I bought a new chrome grill for it and it will look nice up front. I'm checking over the nuts & bolts and such getting it road ready 'cause it's getting close to Louisville time again and this year it's going. That is if I can keep focused on the project and no major problems happen. I am working on a transmission leak and last night I noticed a fuel leak in some of the joints in the fuel line. The car needs a good cleaning since it's been sitting here for three years. I have been working on covering up the holes in the firewall to keep the fumes down and I have to fix a few holes in the floor.
On July 19, 2003 the final bugs were worked out and I drove the car to Louisville, KY on July 29, 2003.
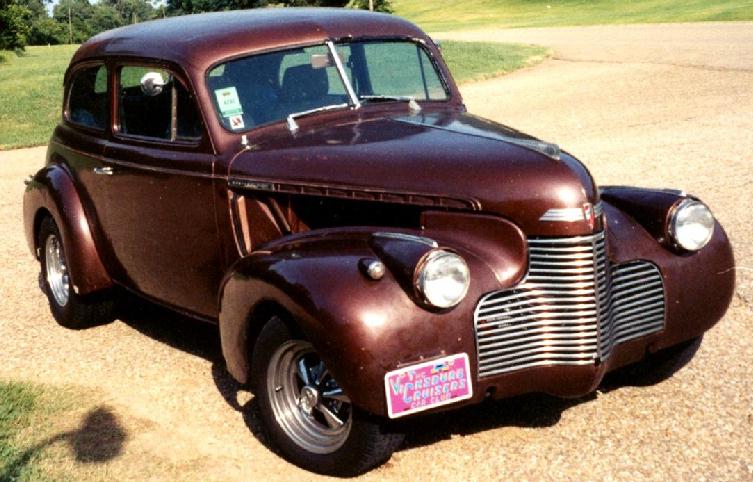
Forget about holes in the floor, throw some carpet and insulation down and drive it! And I did...all the way to Louisville, KY and back with no problems. What a great feeling after waiting 3 years. This picture was after returning to work the Monday after getting back from Louisville. It was registered as number 4,237 of 11,288 registered cars! We had worked out the latest bugs a week earlier and I started driving it all over town. The fuel regulator was no good, so we took it off and the car did fine because the fuel was not regulated anymore. A week before going to Louisville, I drove to the Jackson area by myself and back and the only problems I had was leaks in the windows when I got caught in the rain. I now believe in Rain-X.

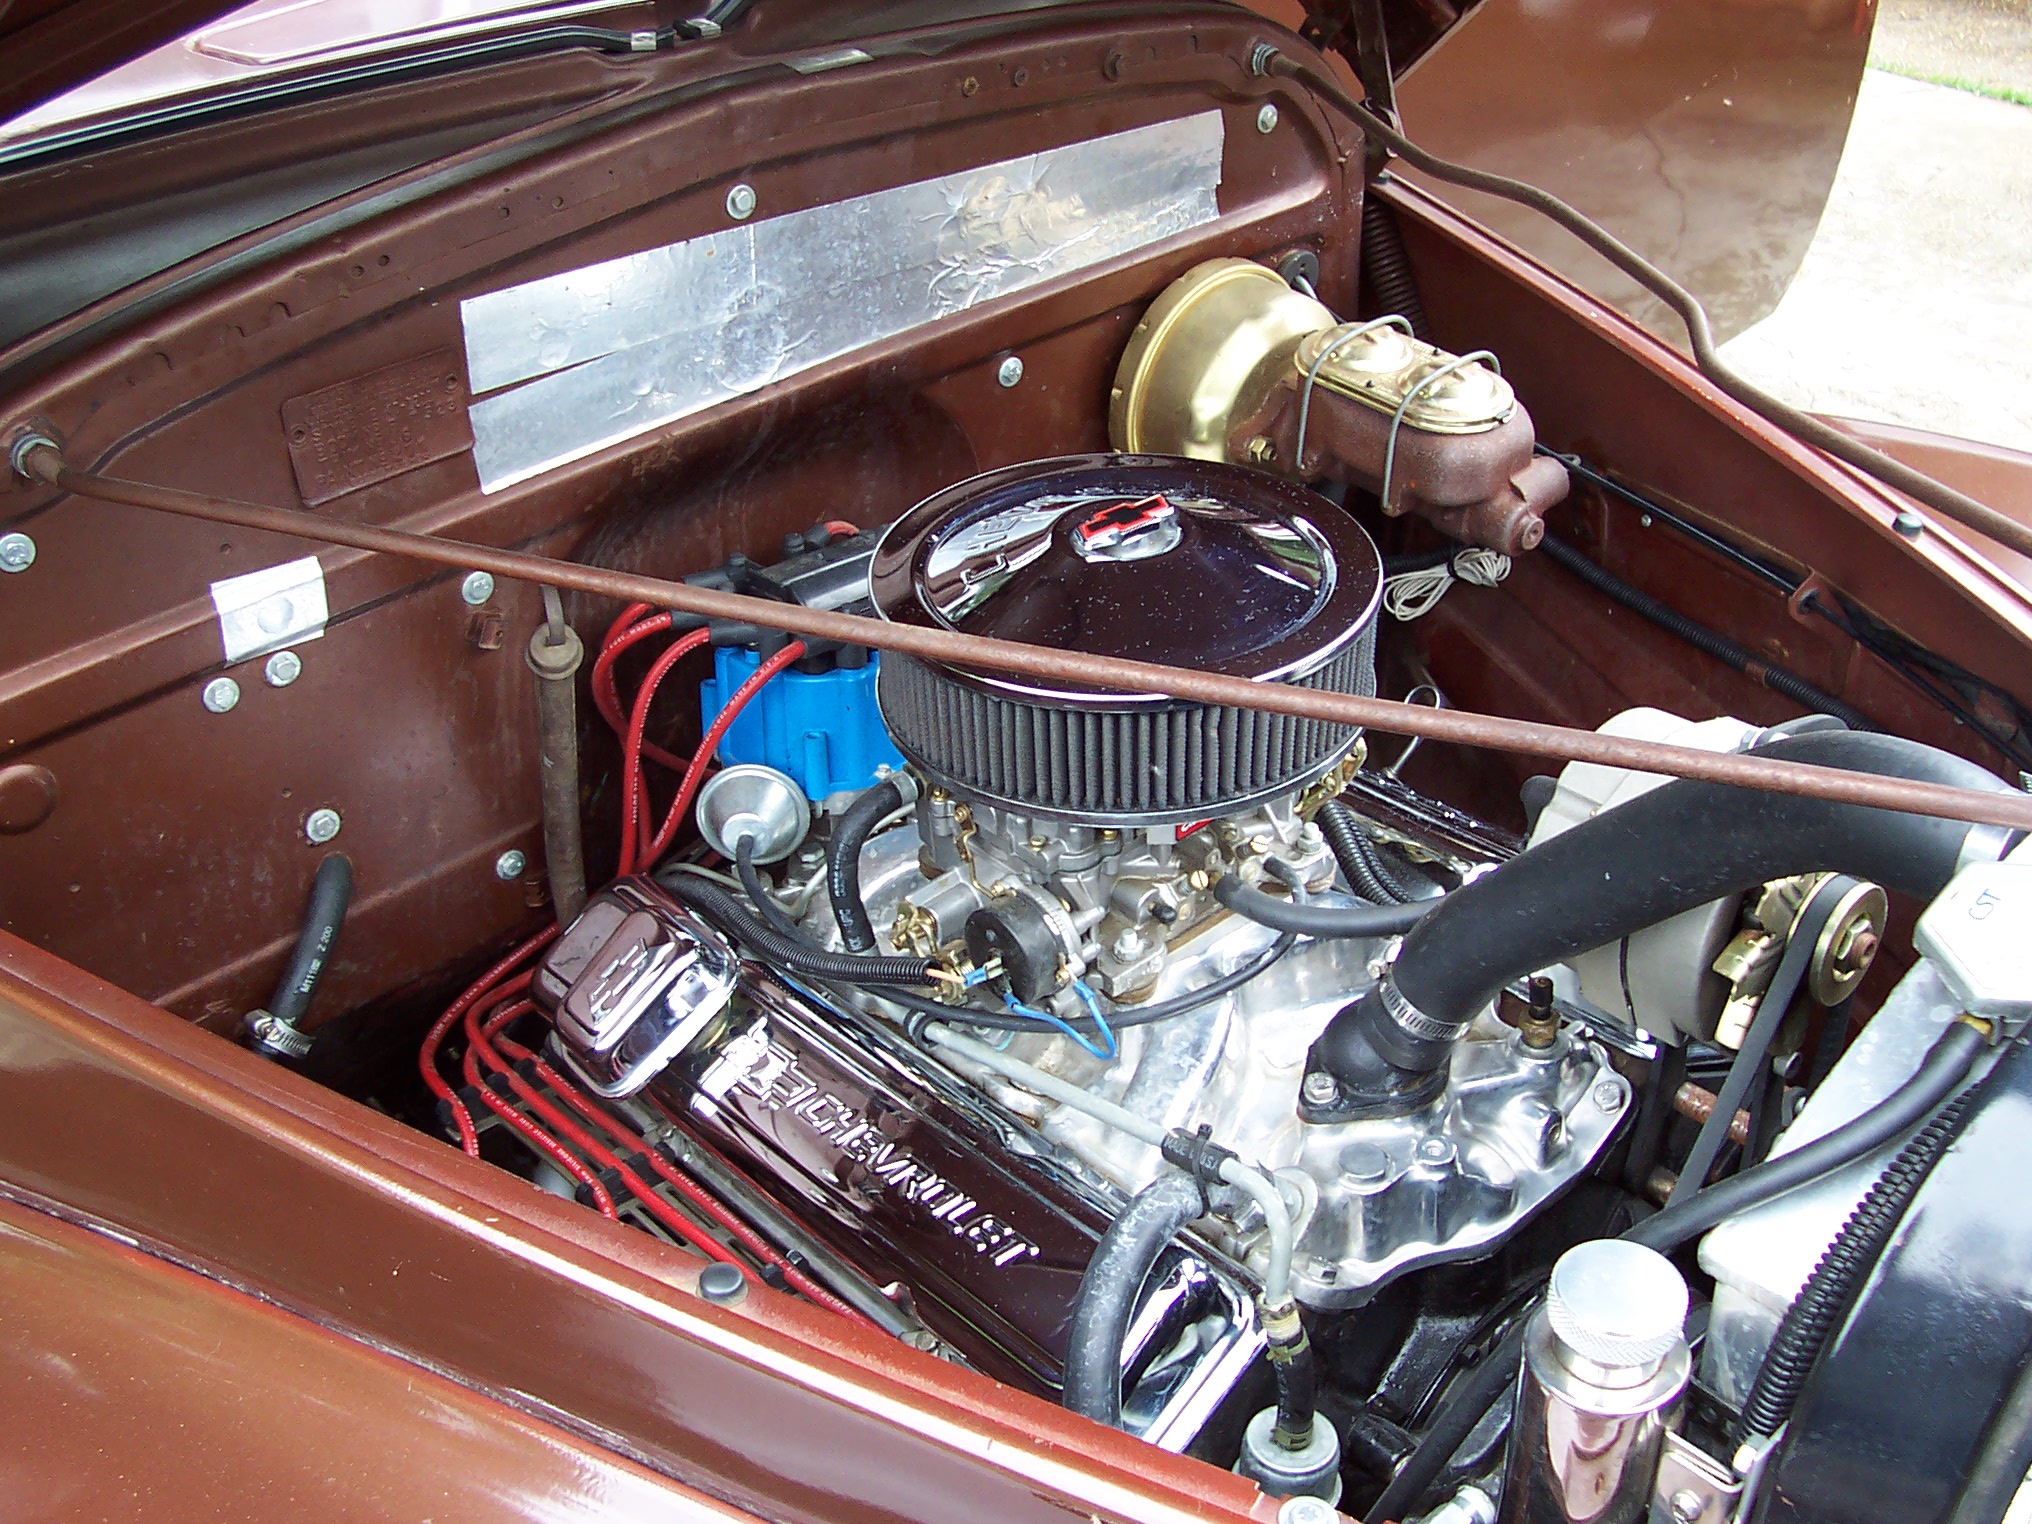
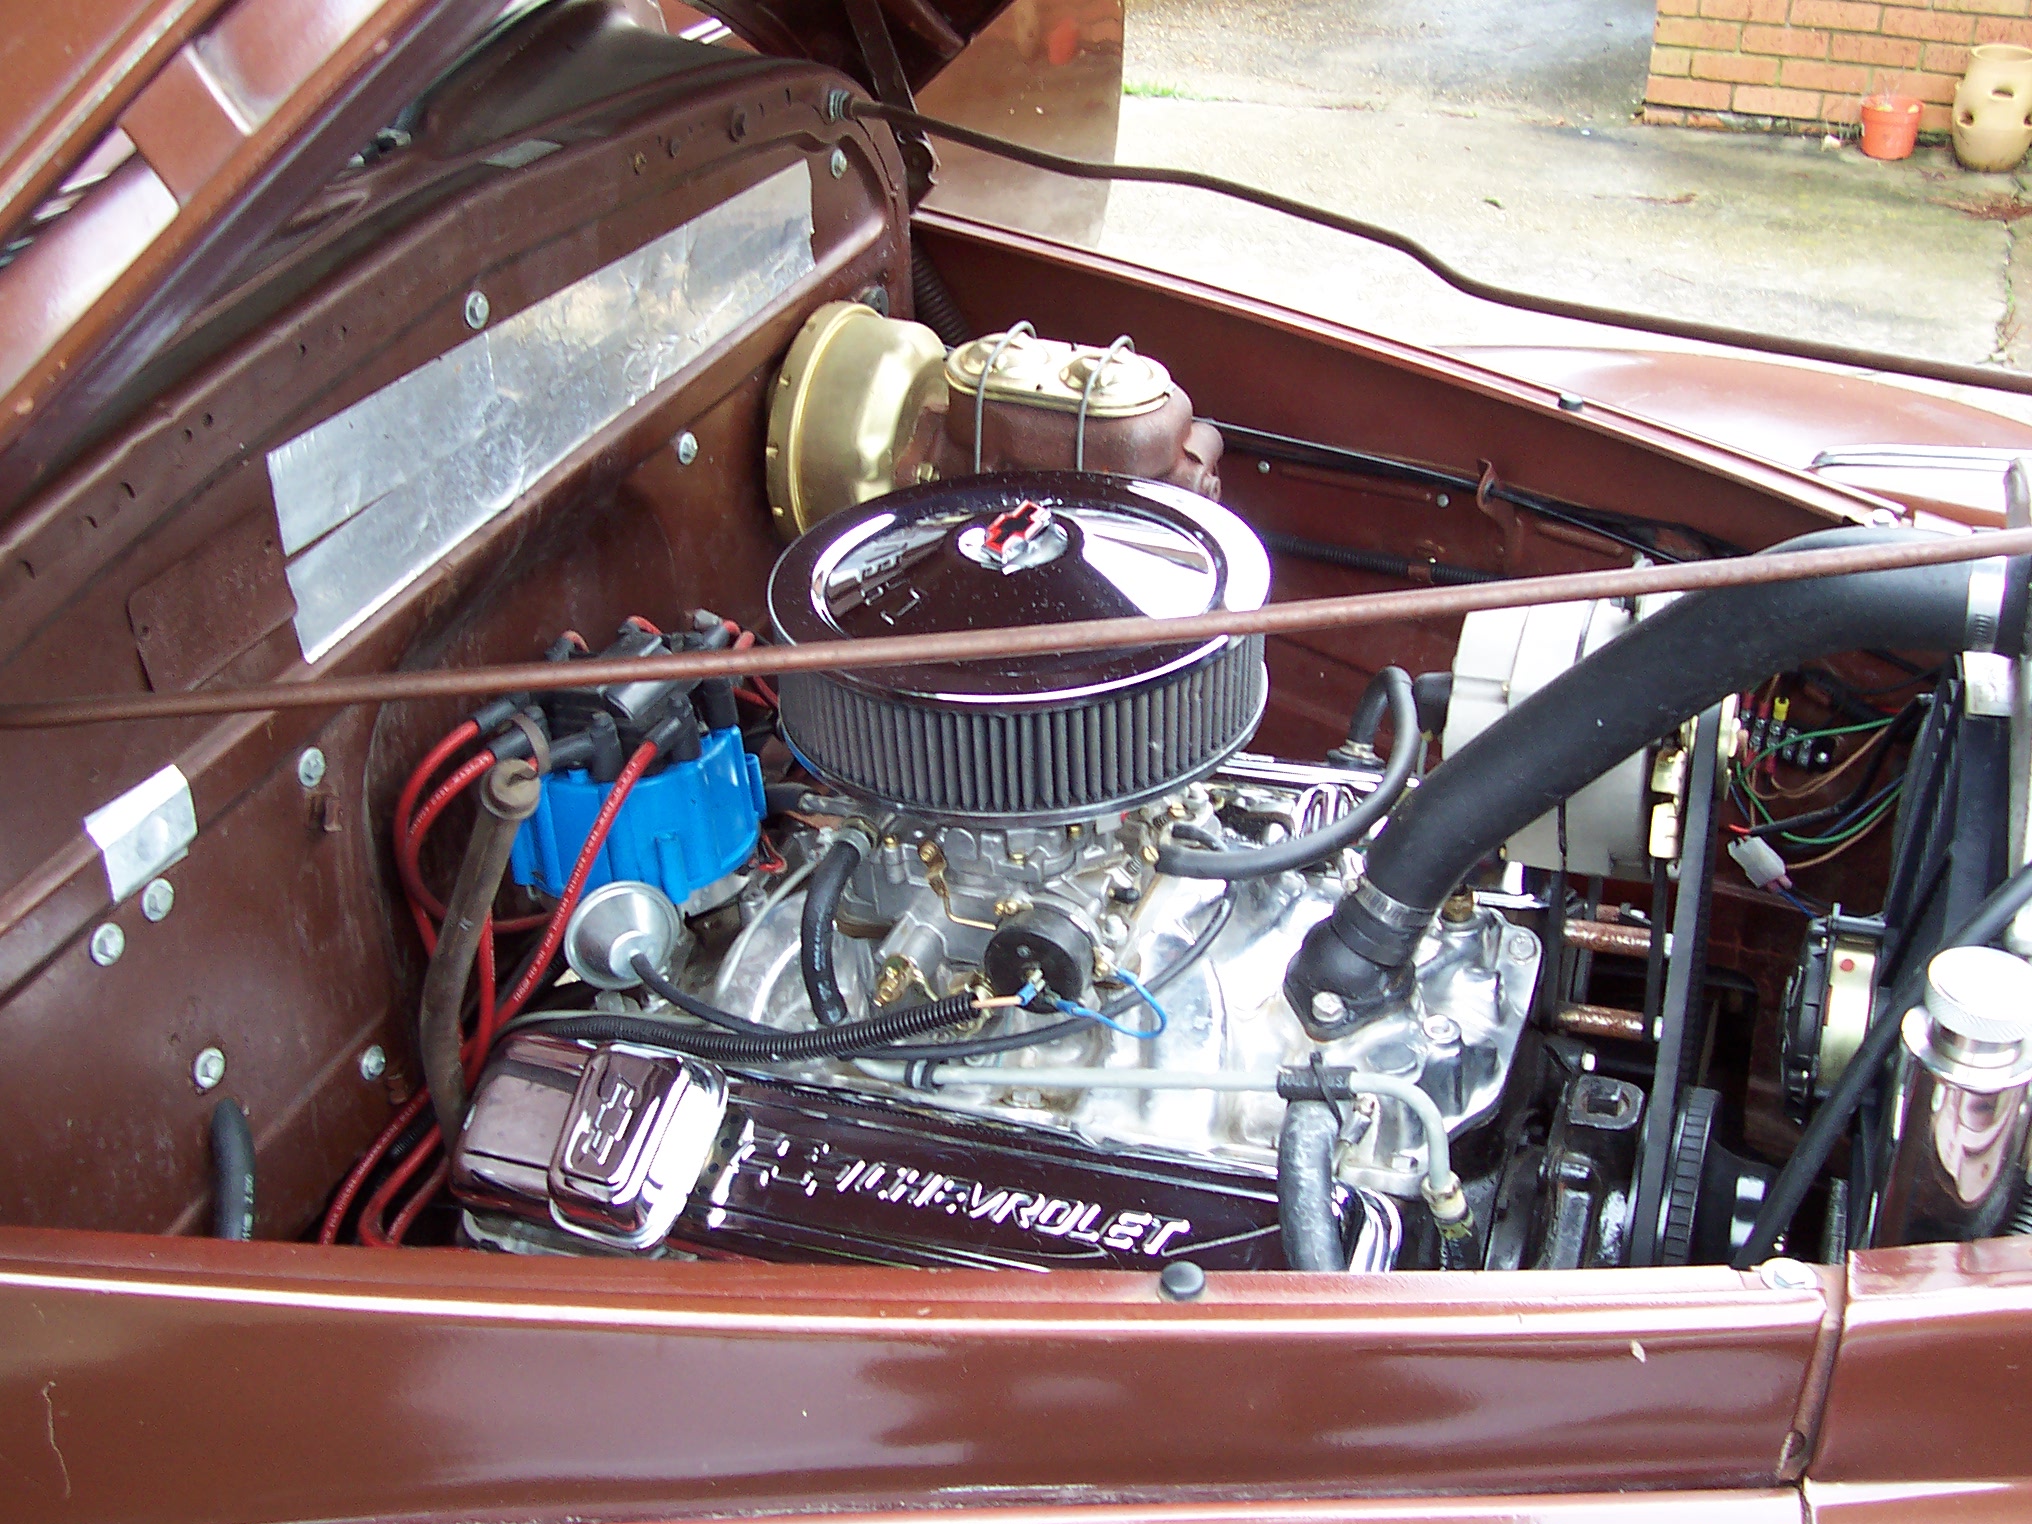
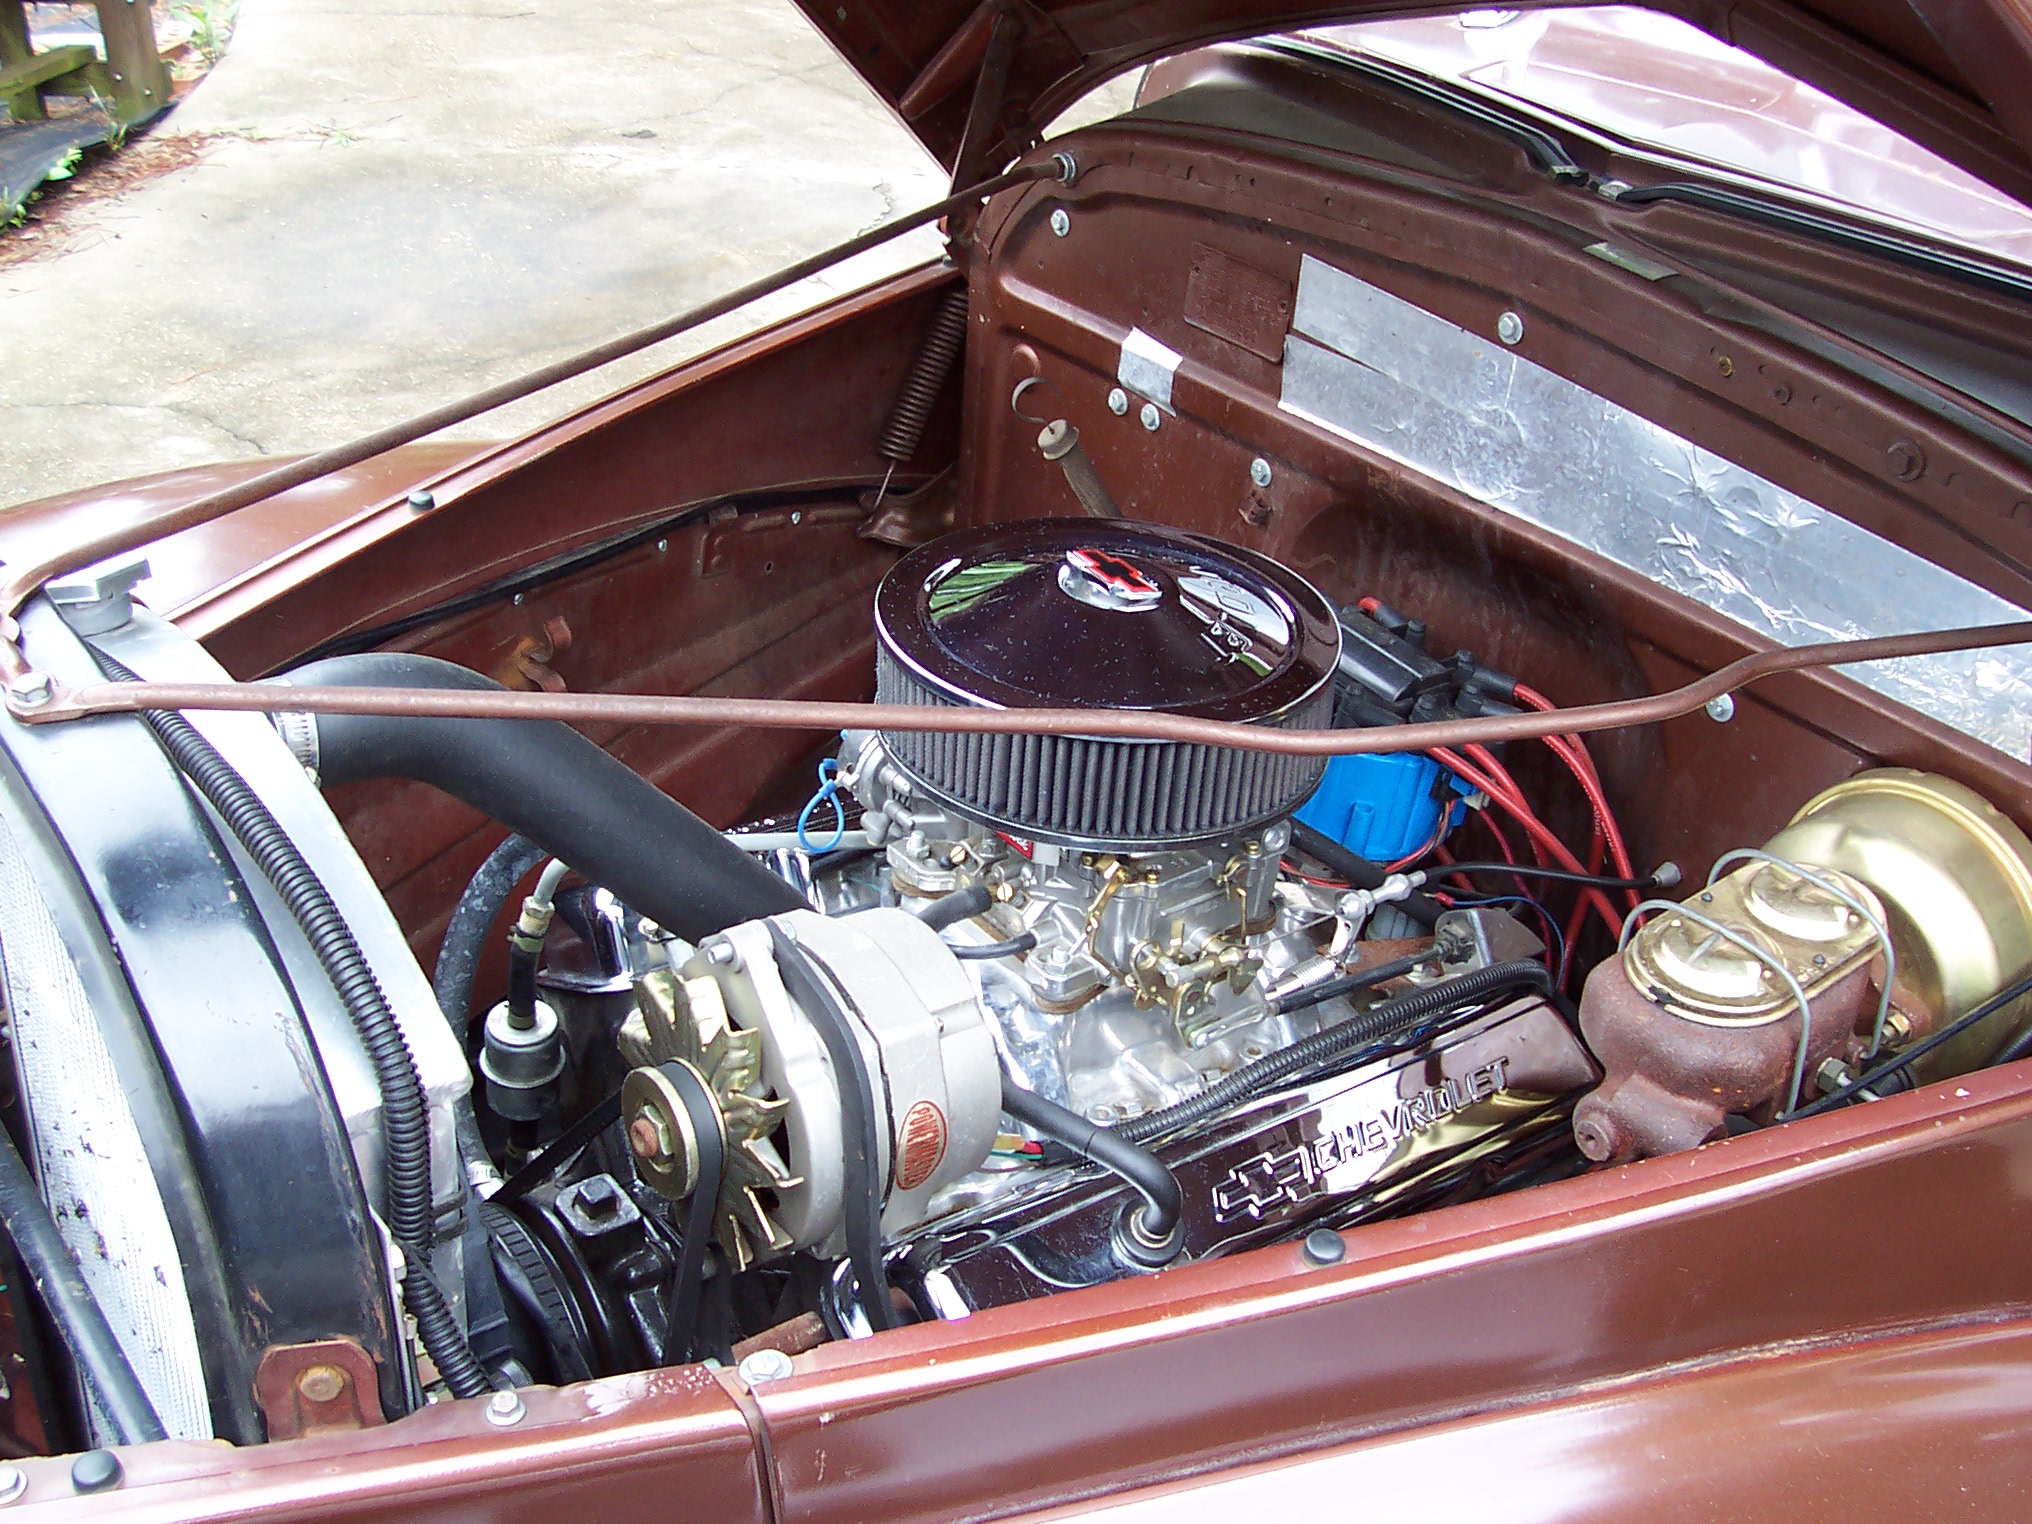
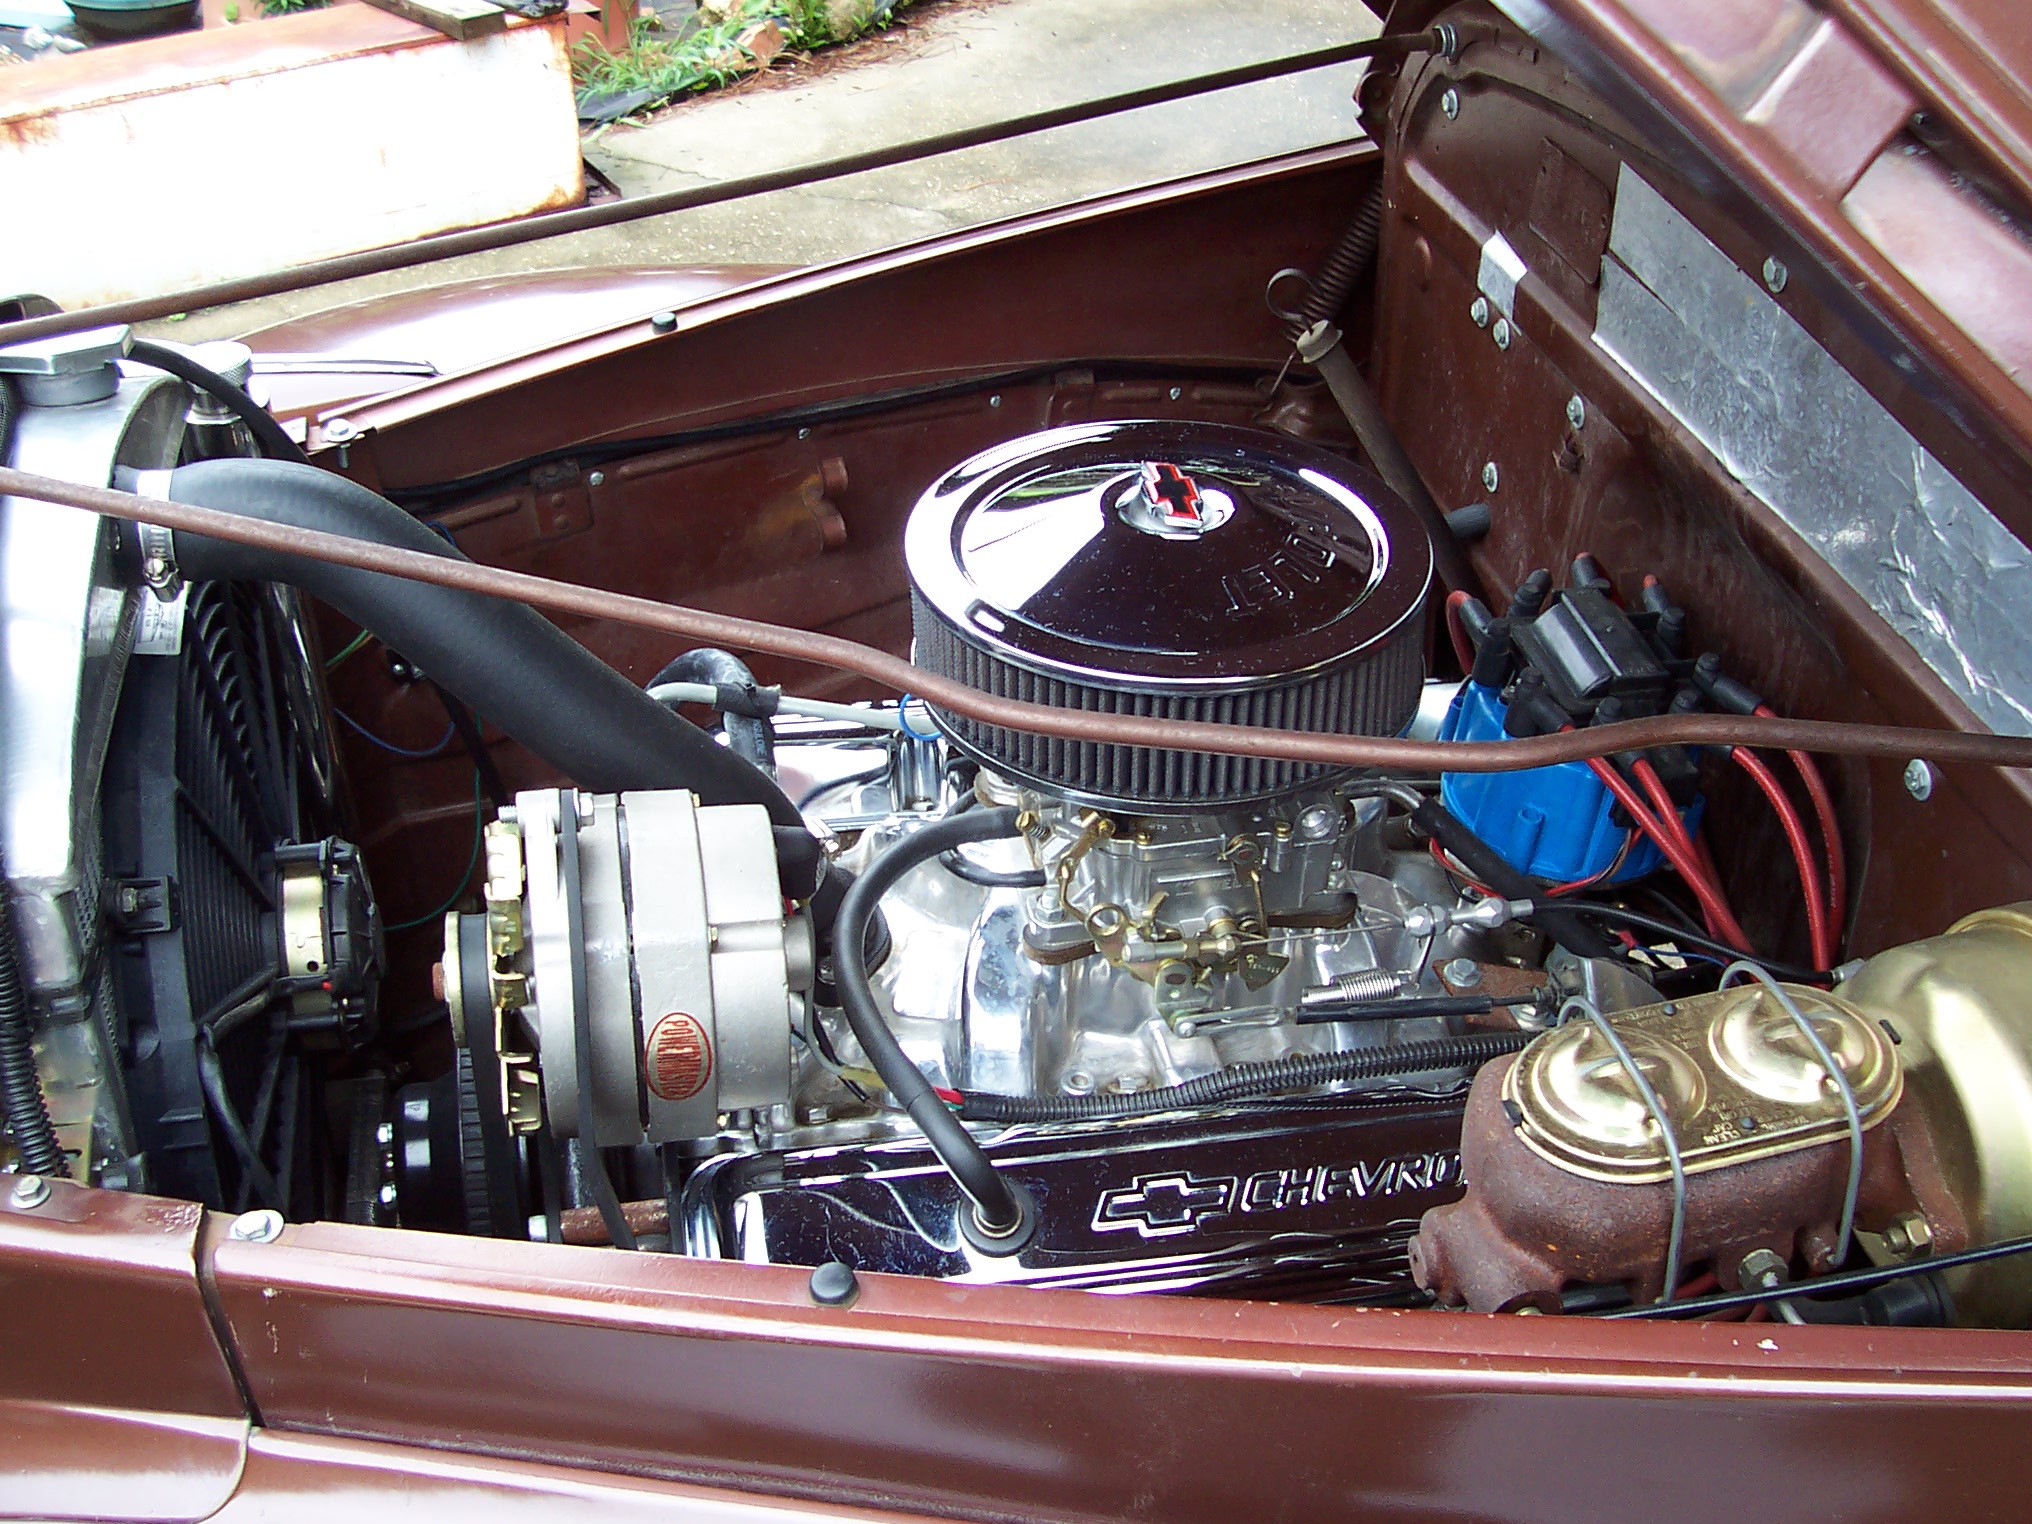
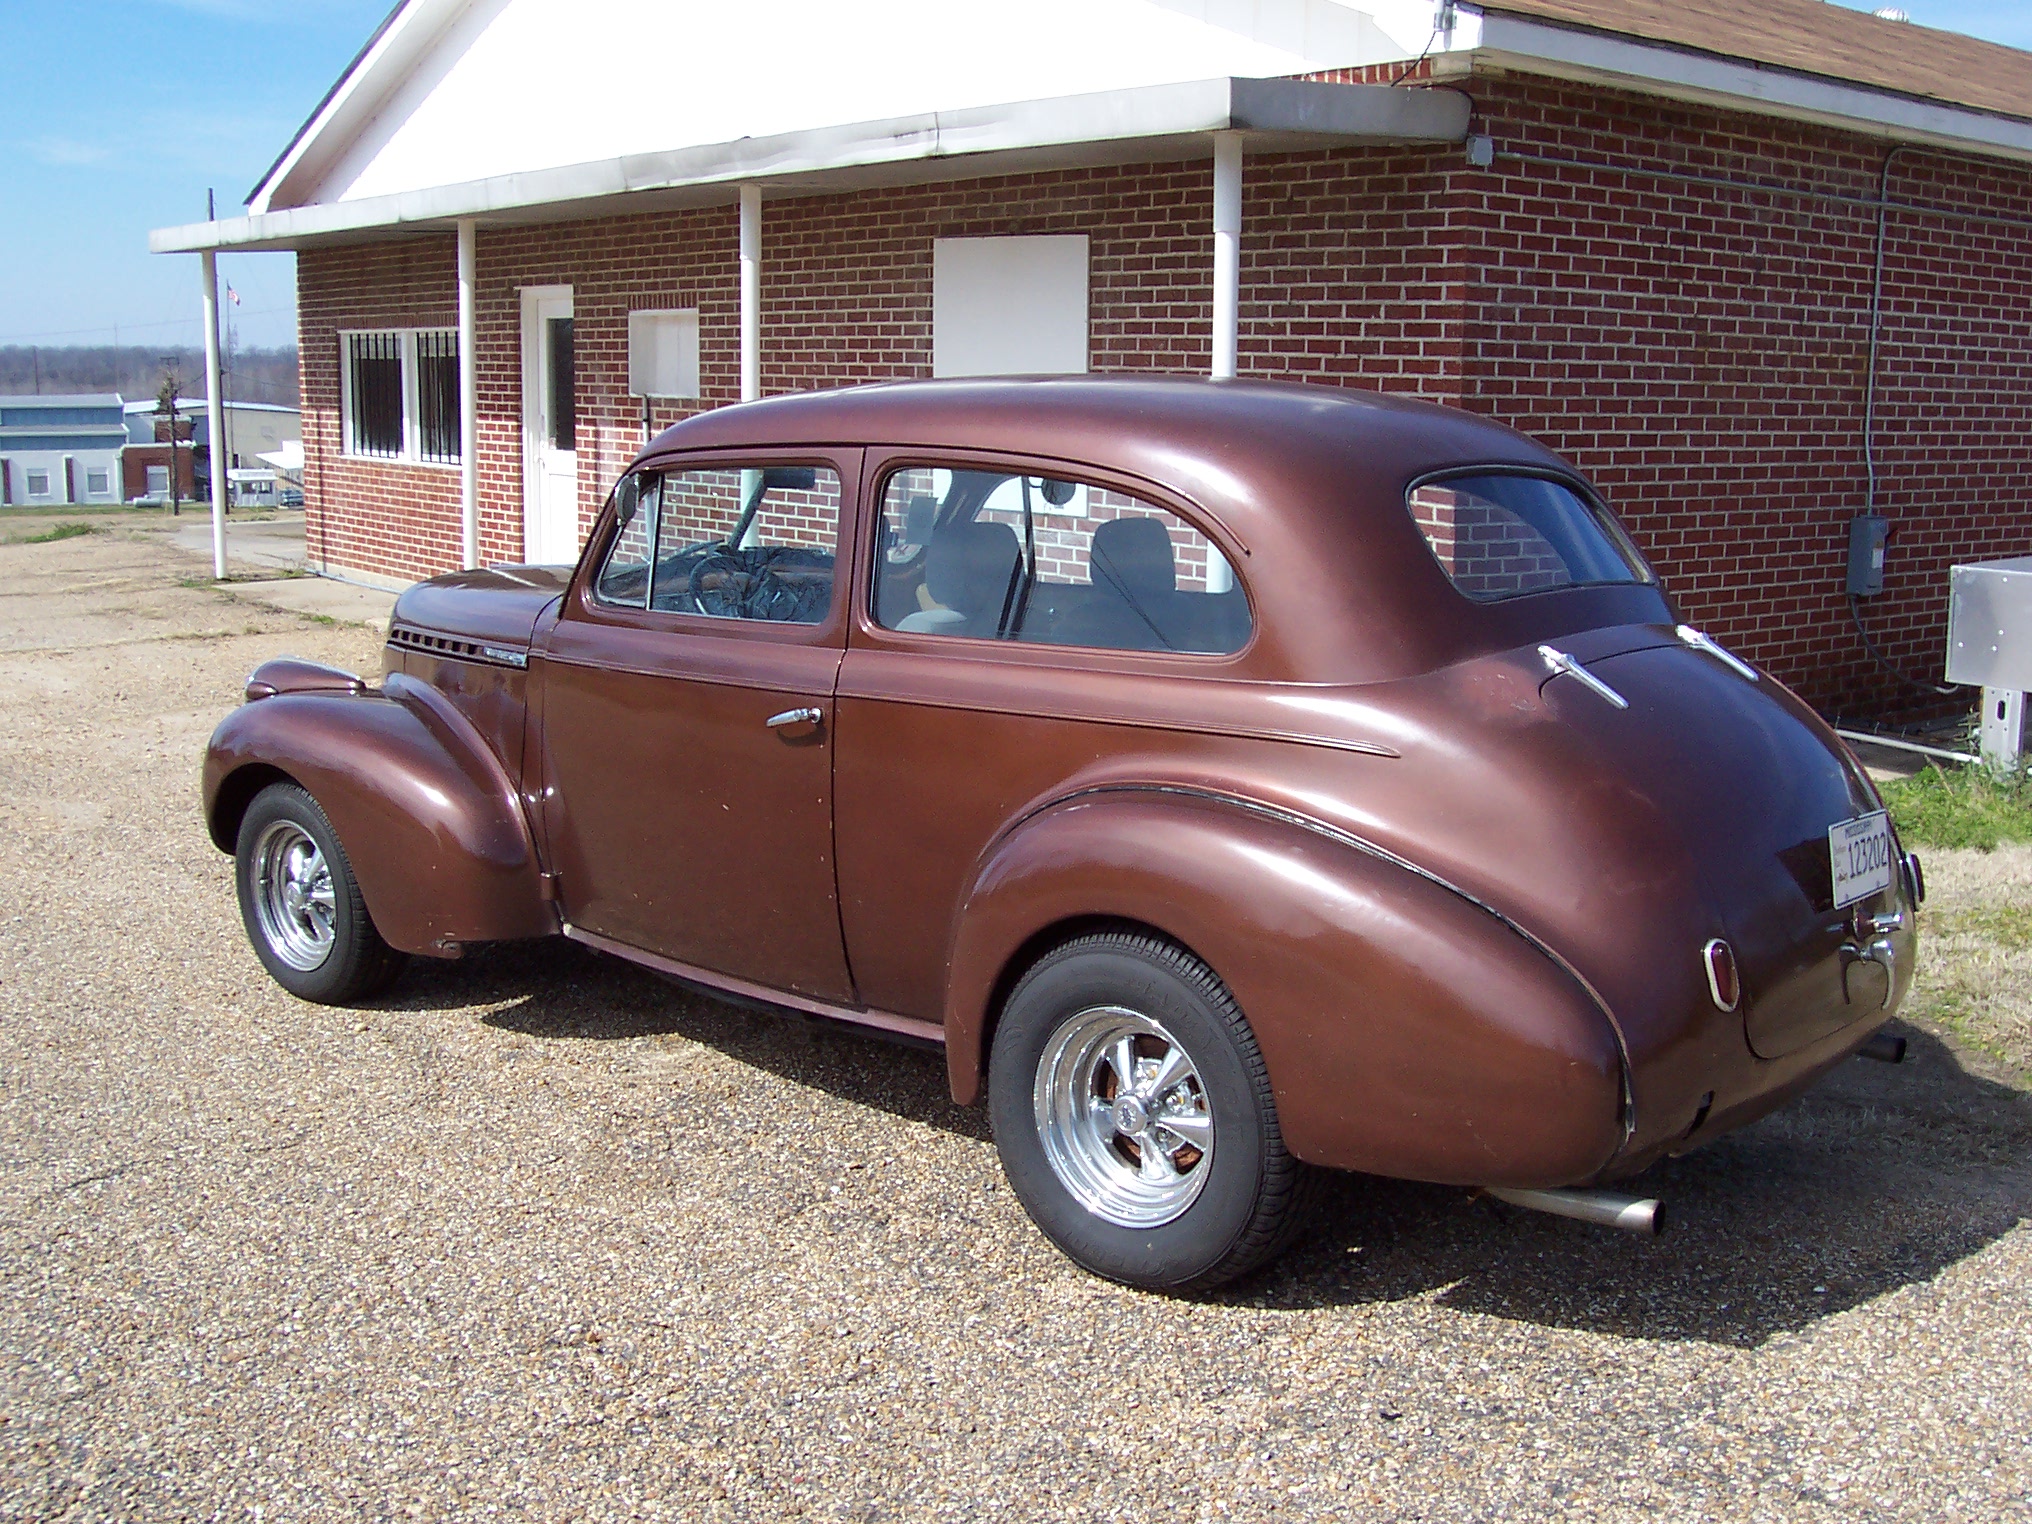
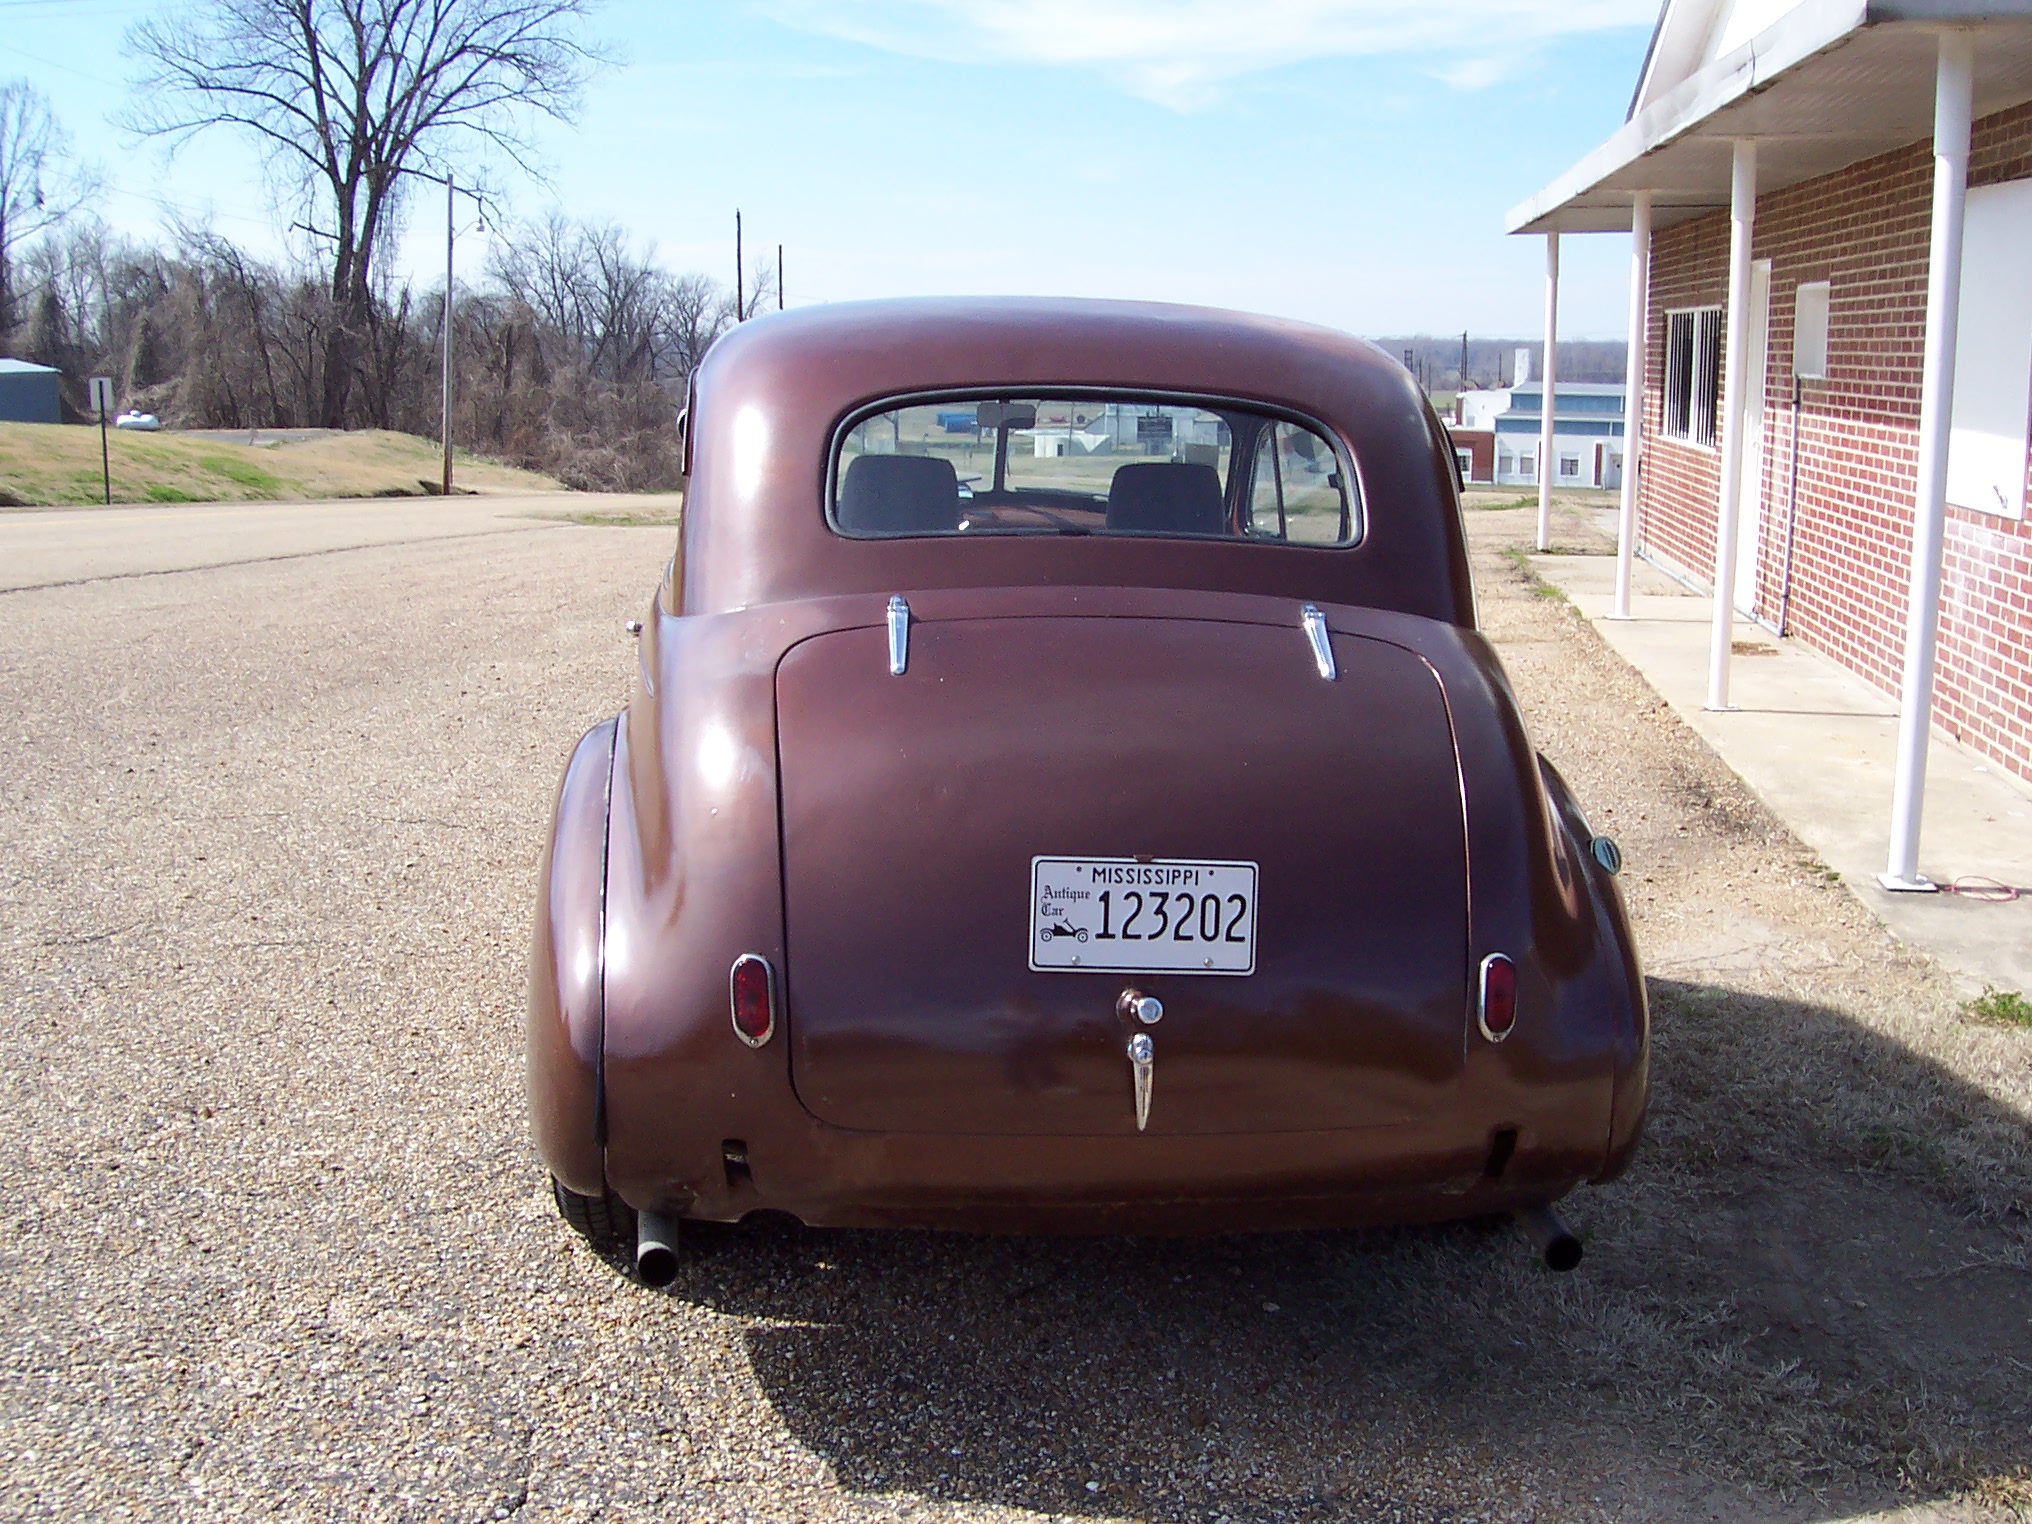
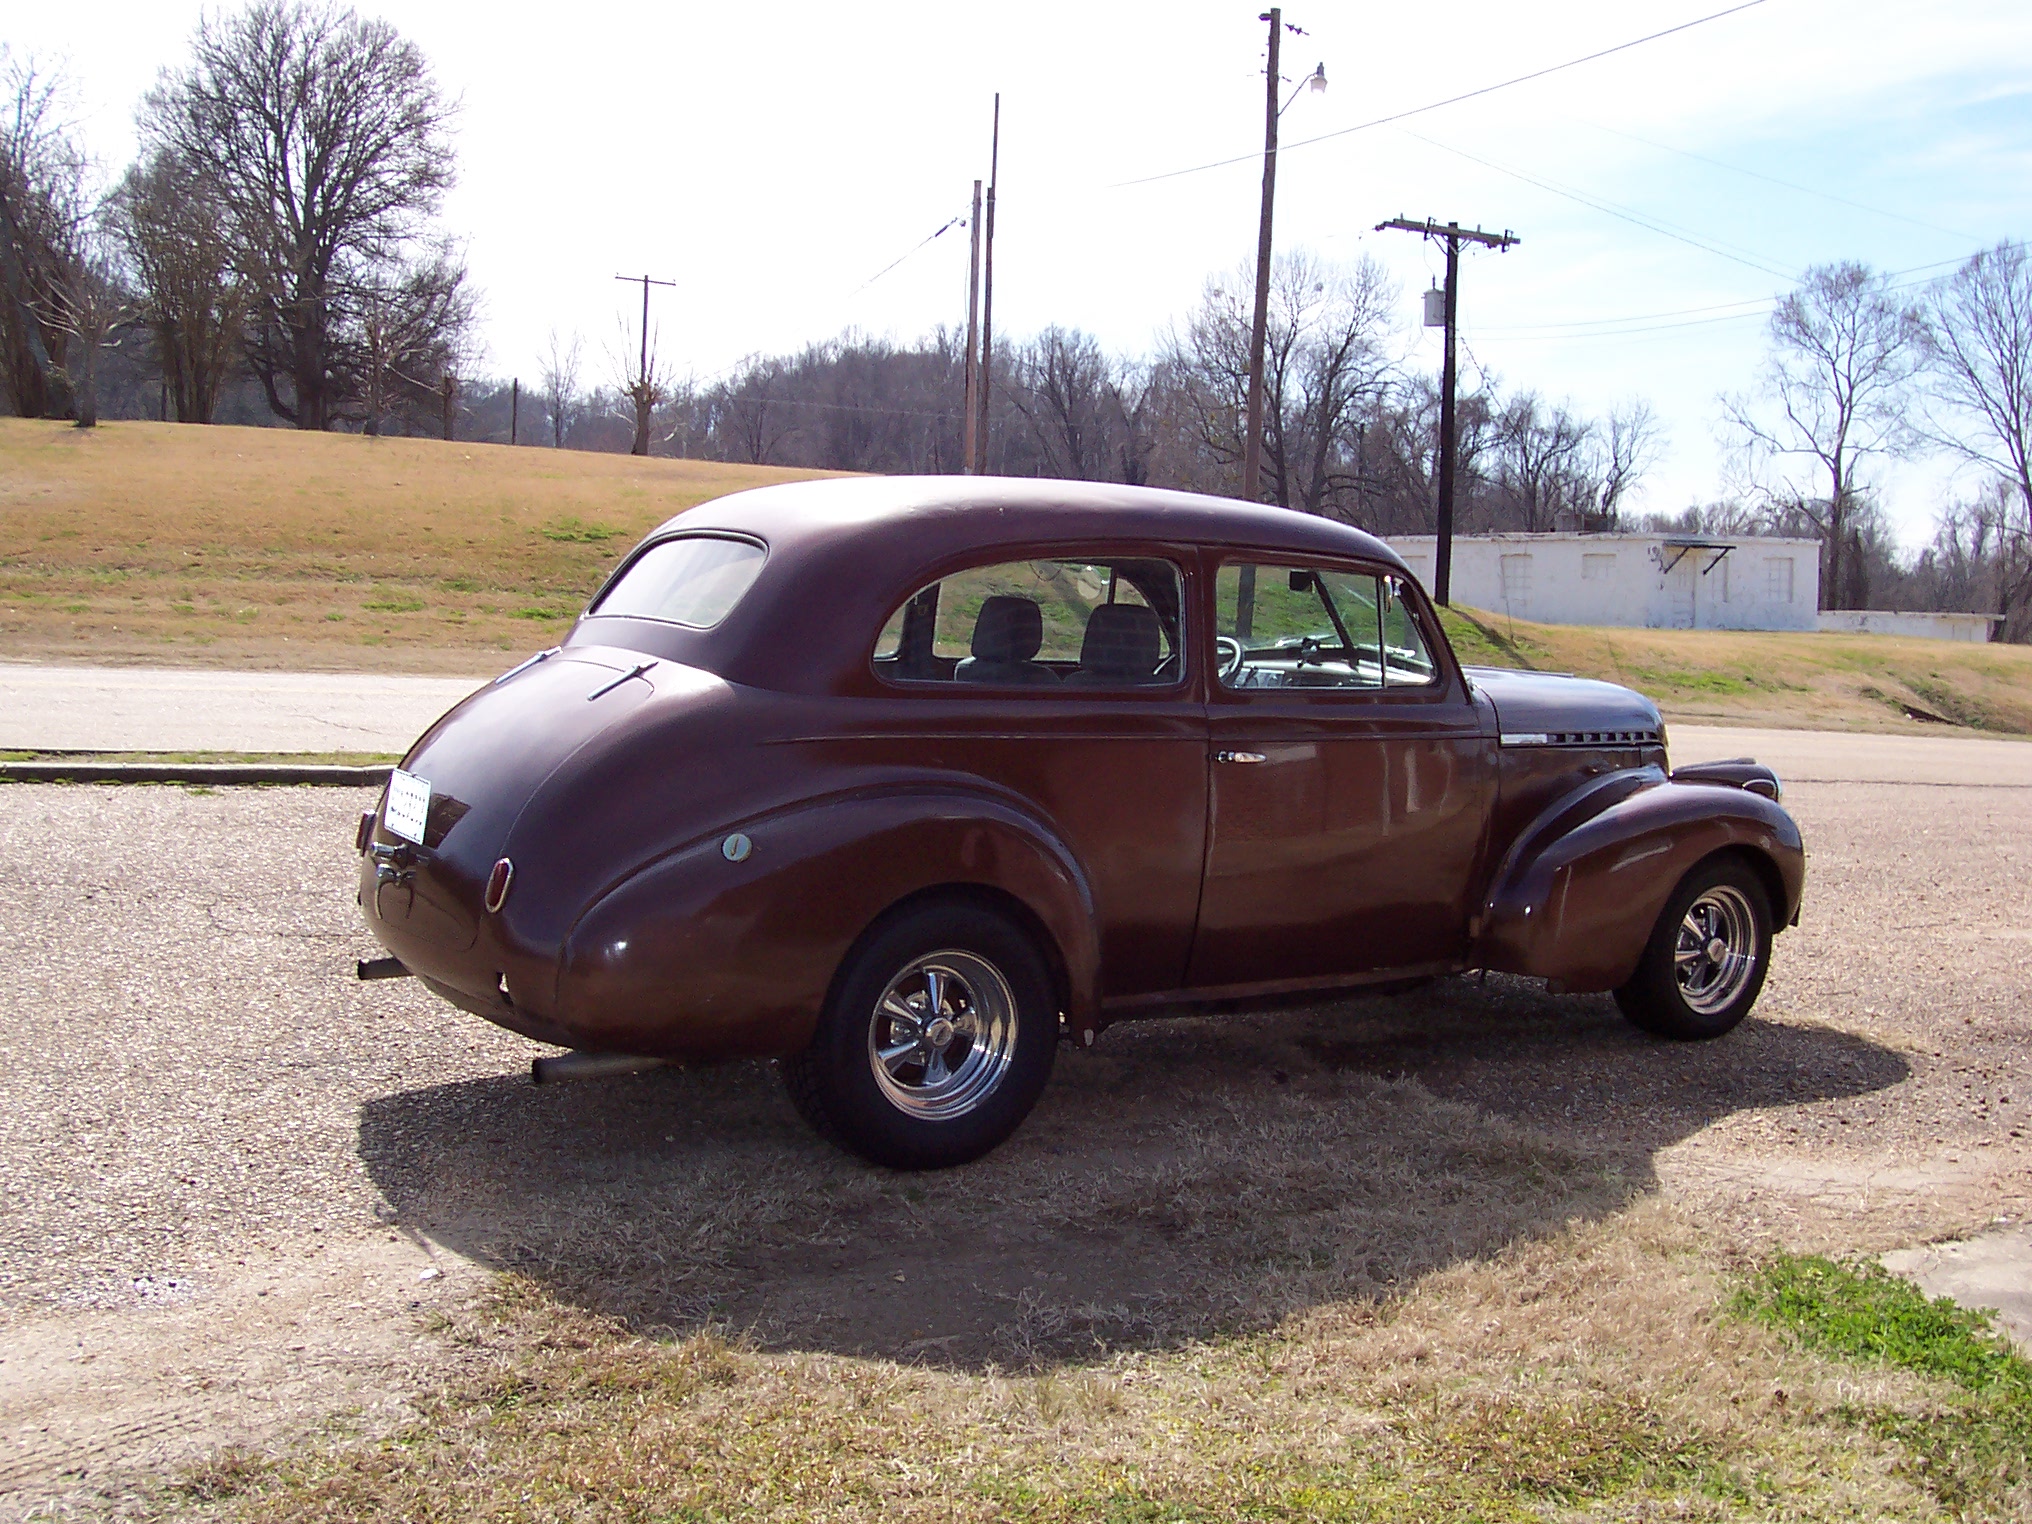
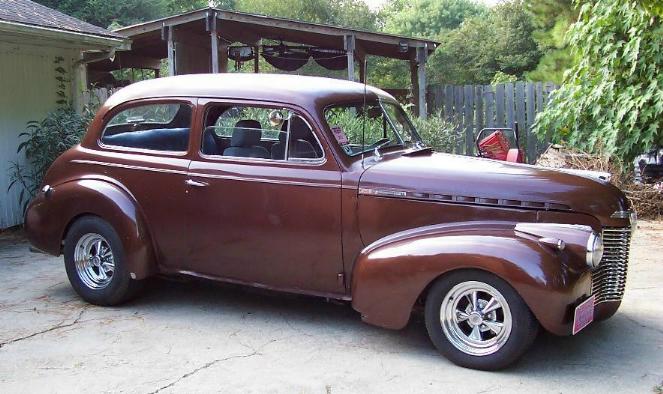
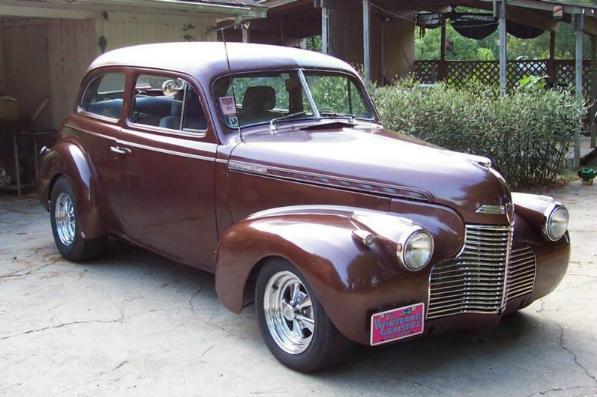
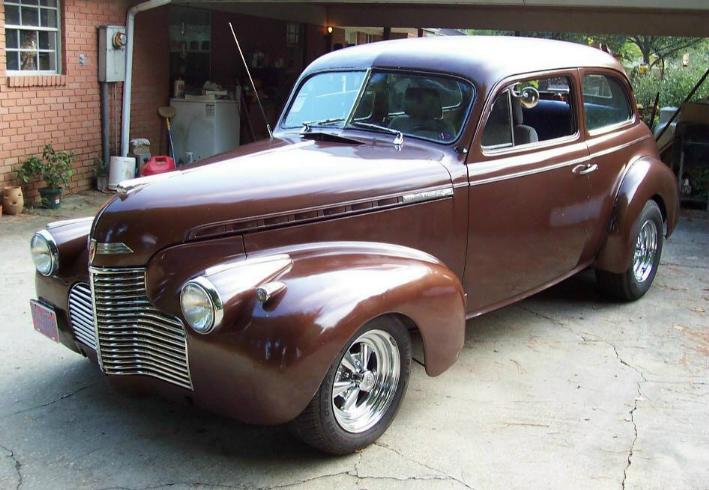
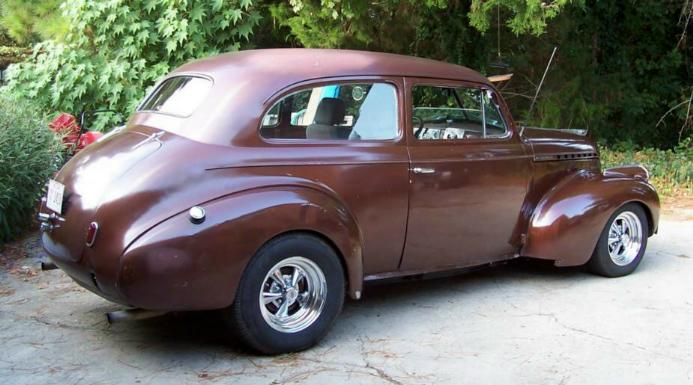
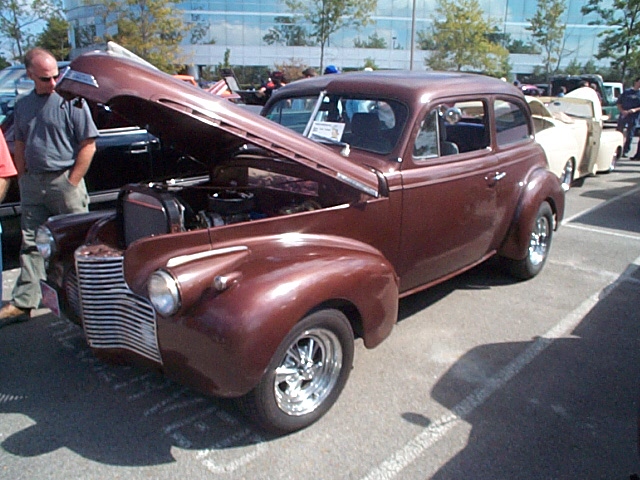
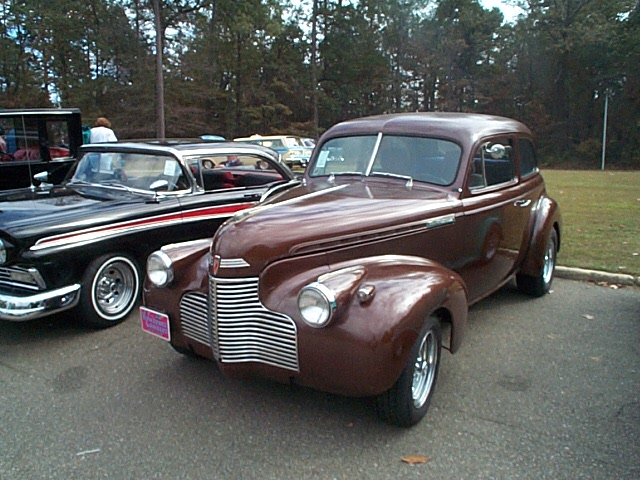
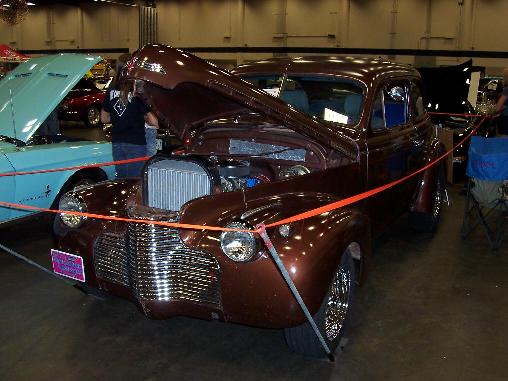
Here are several shots from different angles of the car as it is right now (5/29/04) including several pictures of the motor area.
The car now has over 4,000 miles on it and it's been funnnnnnnn!
Here is a list of the items that have gone into the car as of now:
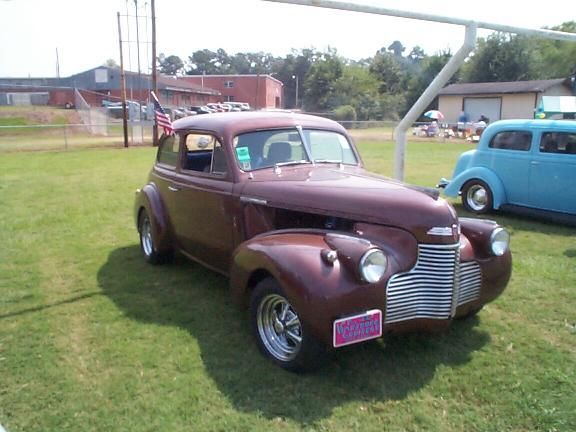
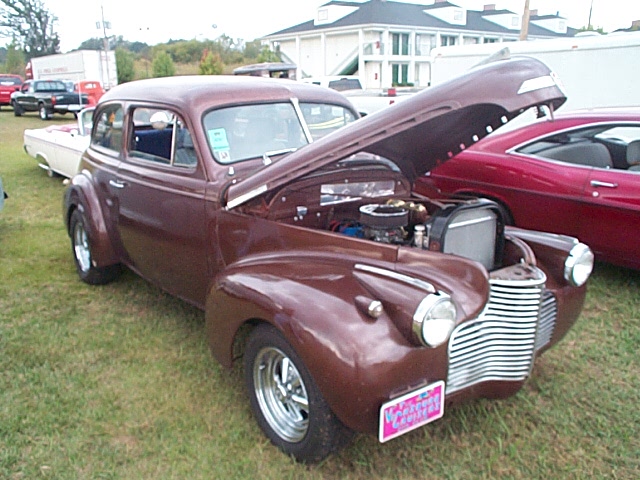
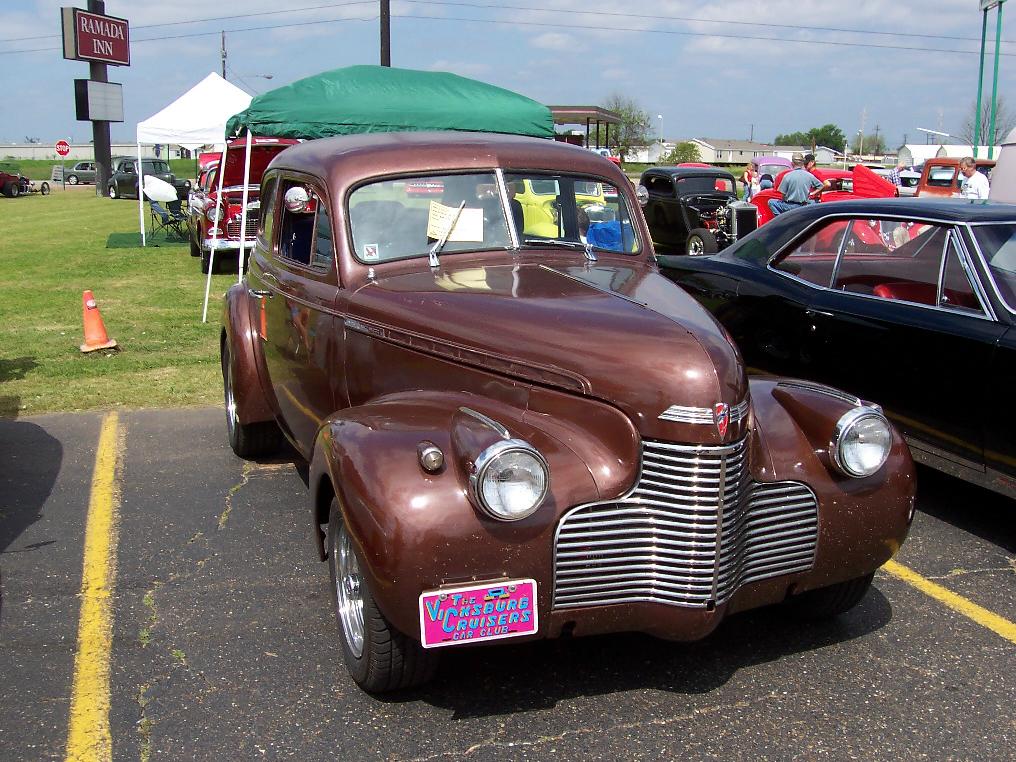
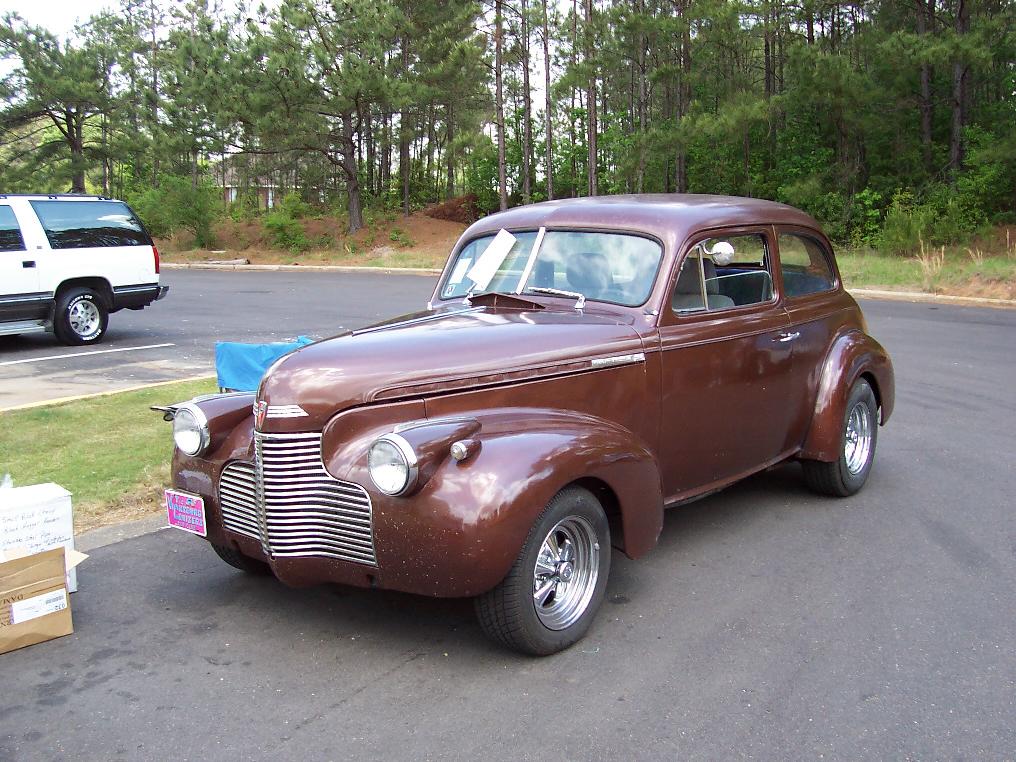
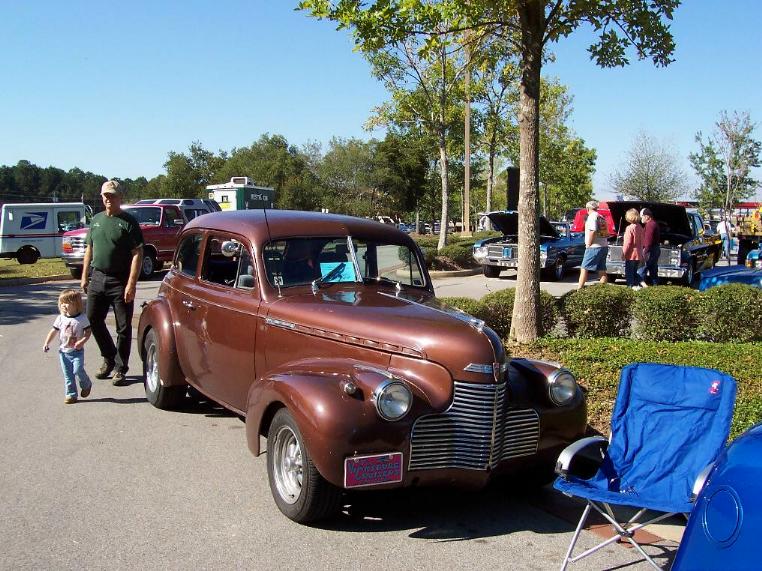
1/27/2005 update: In 2003, I drove the car to 6 events. In 2004, I drove the car to 15 events and I have picked out about that many for 2005. The car is getting close to 12,000 miles now. Here are some pictures of the car at the events it has been to:

2003 (above pictures)
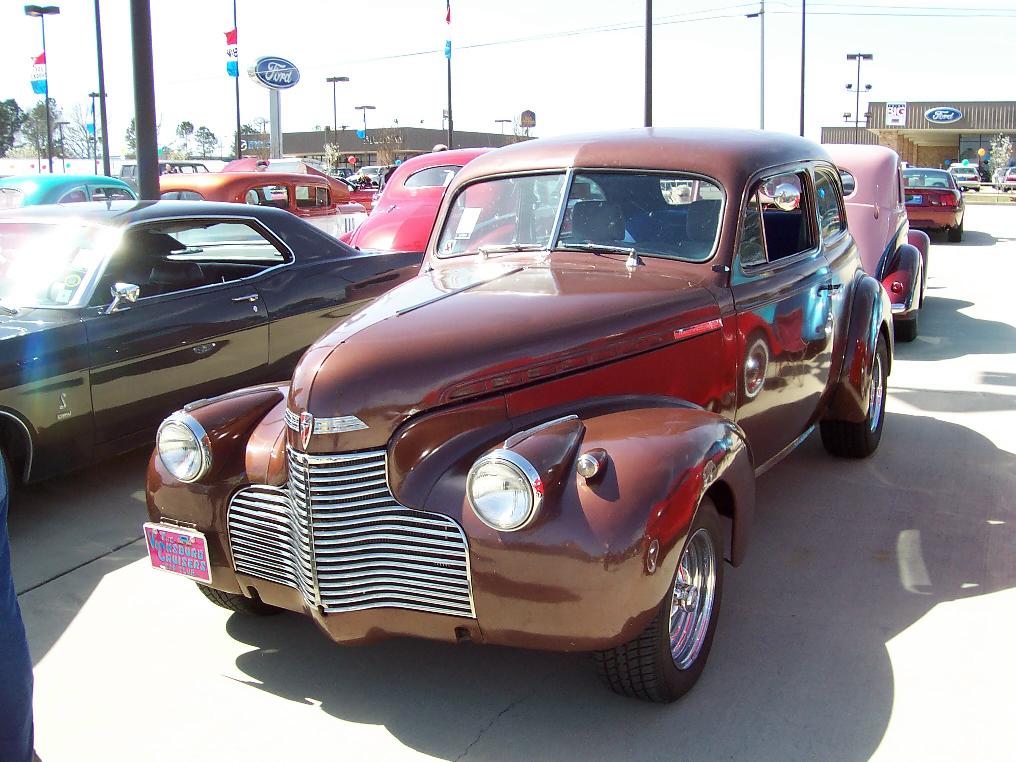
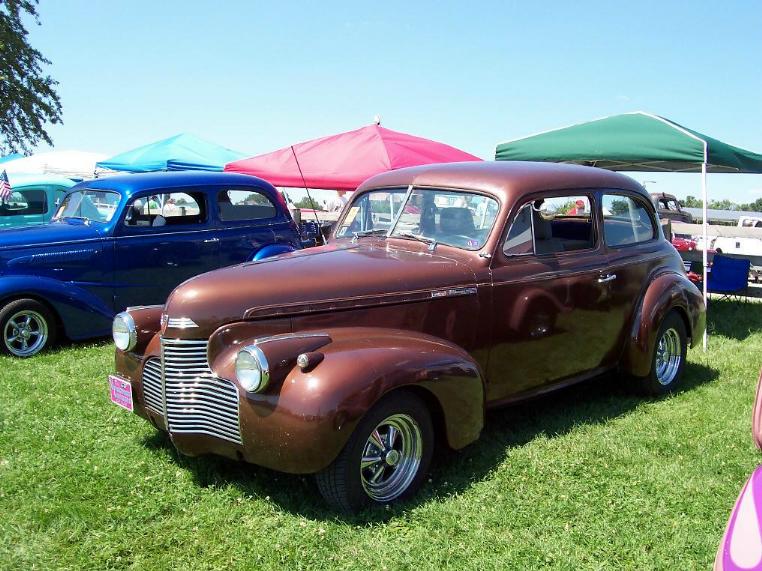
2004 (above pictures)
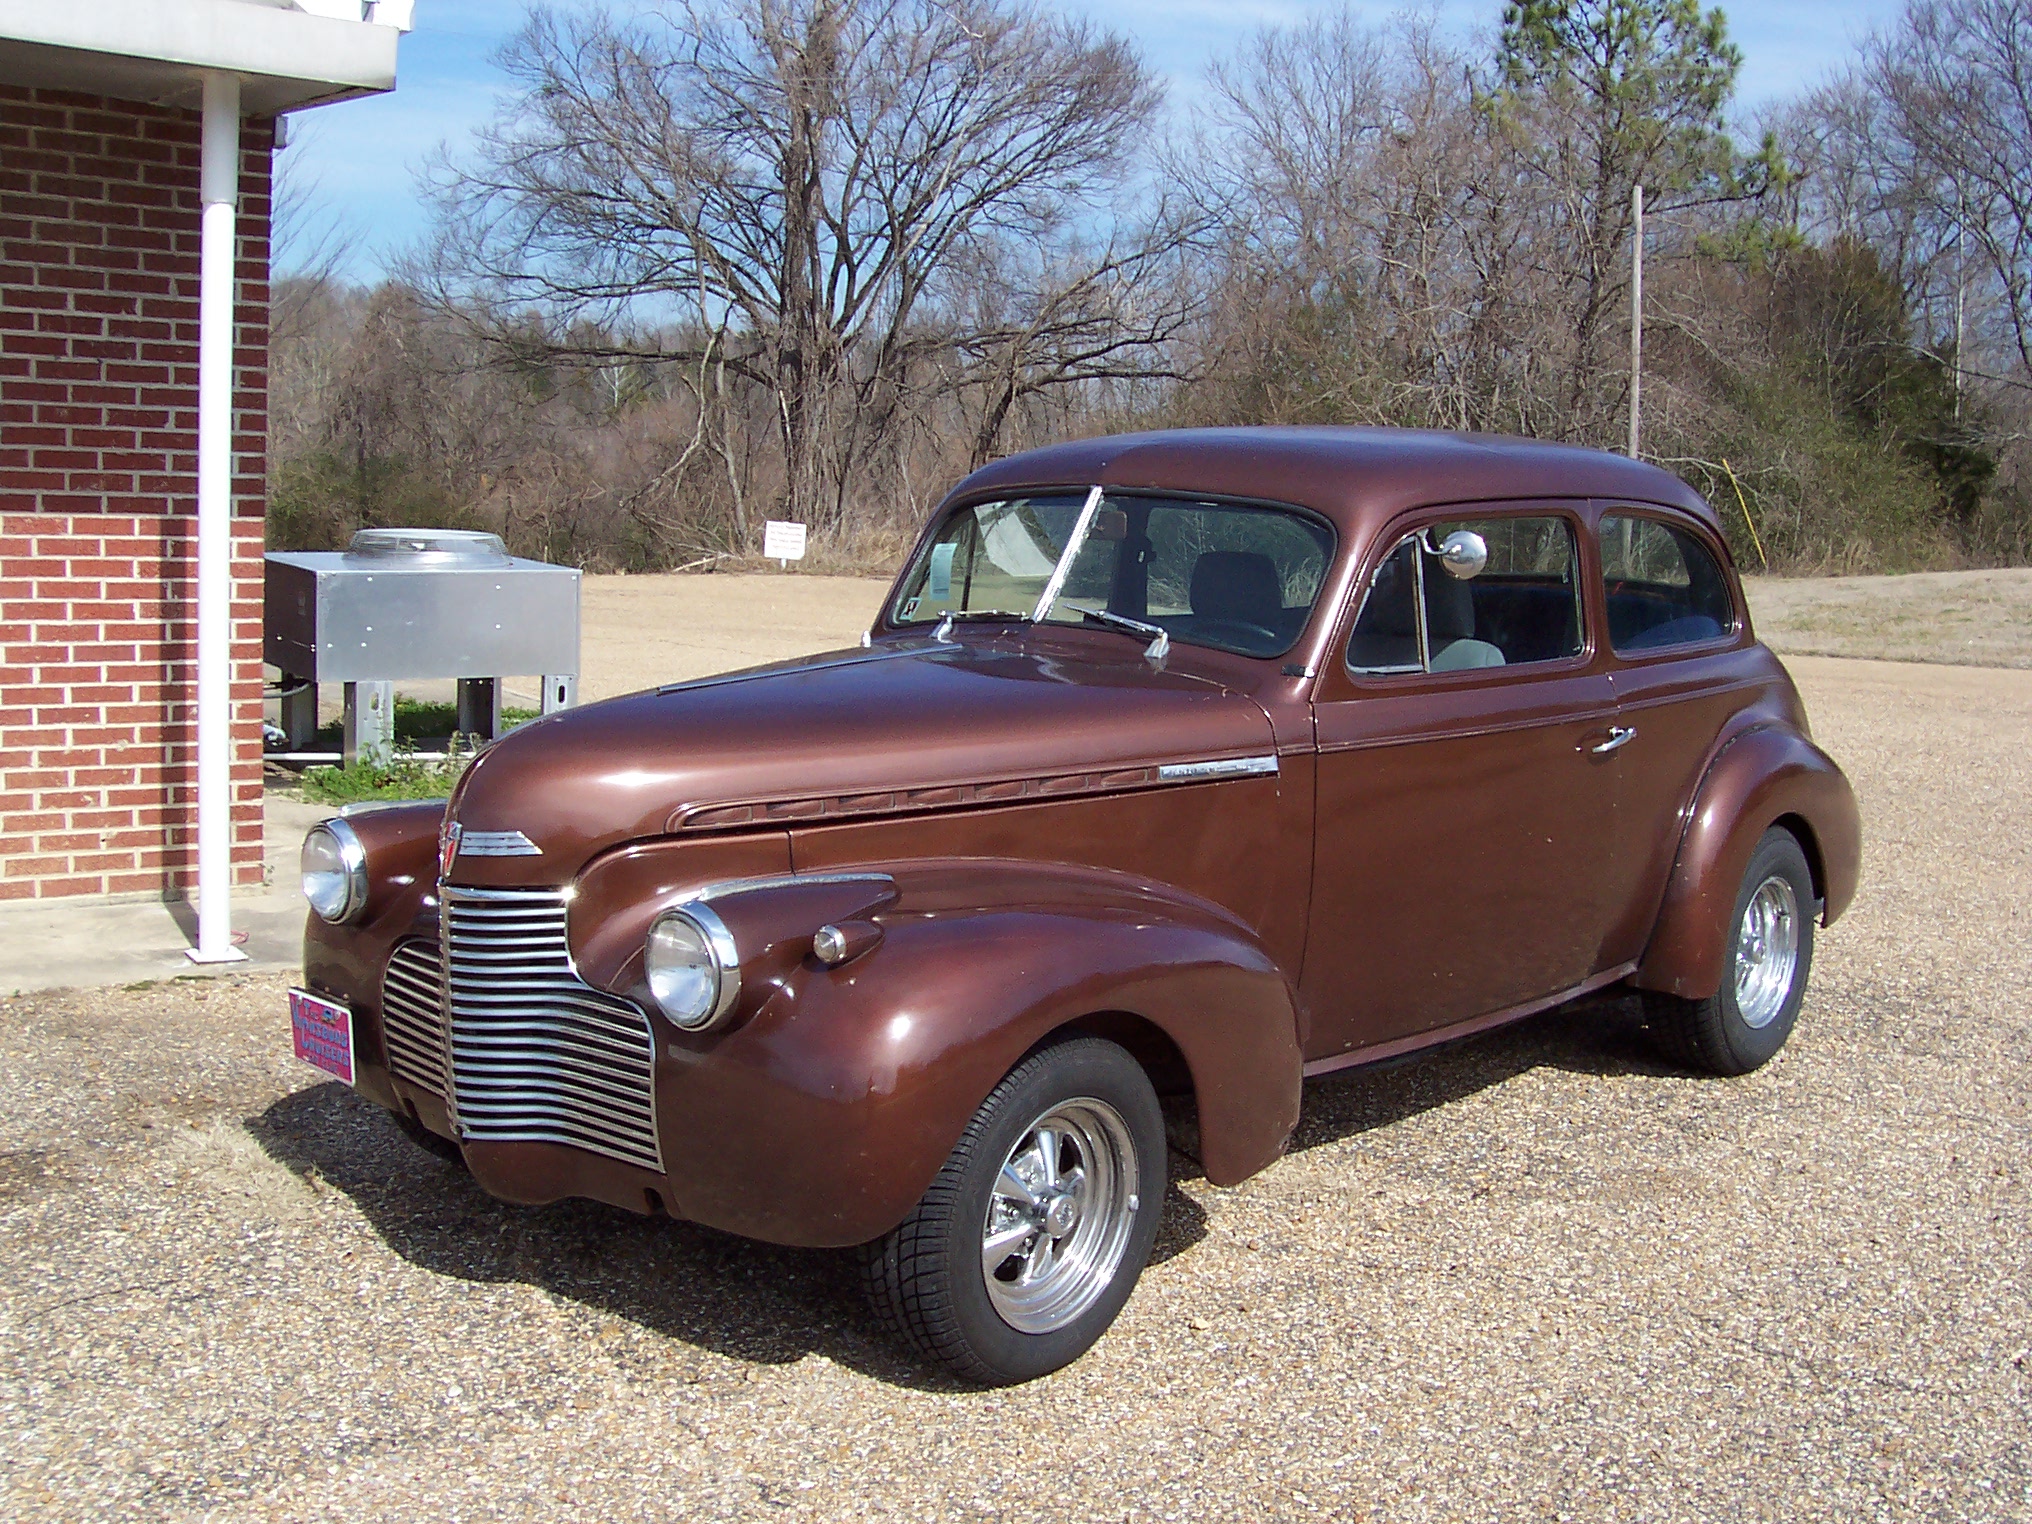
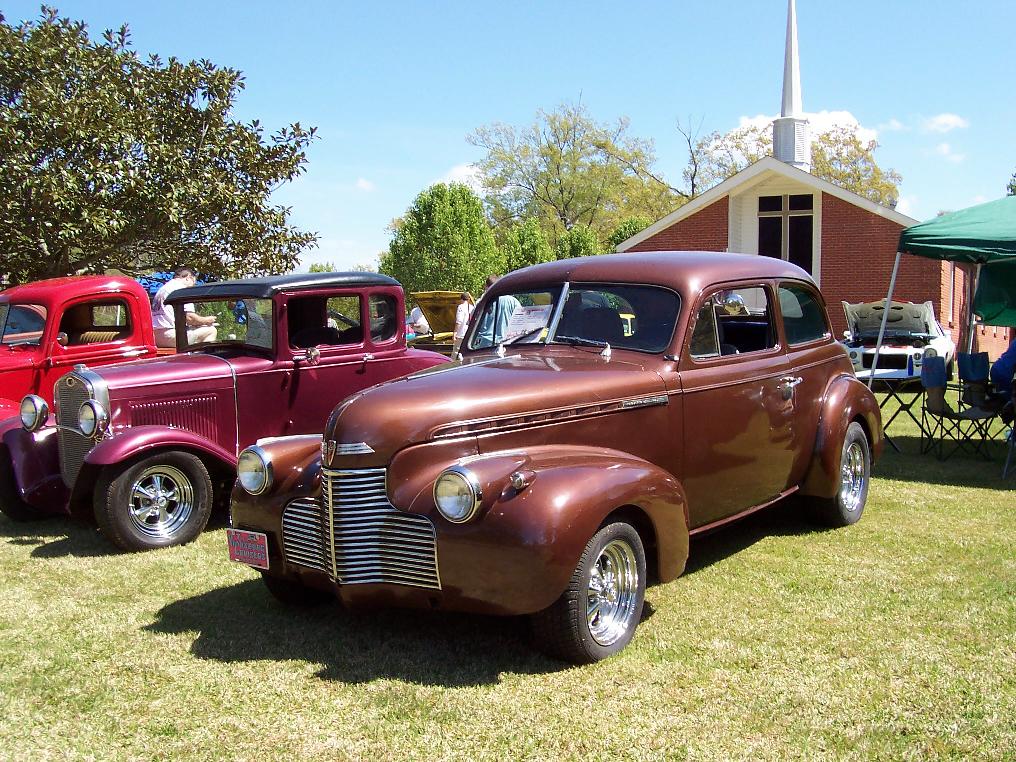
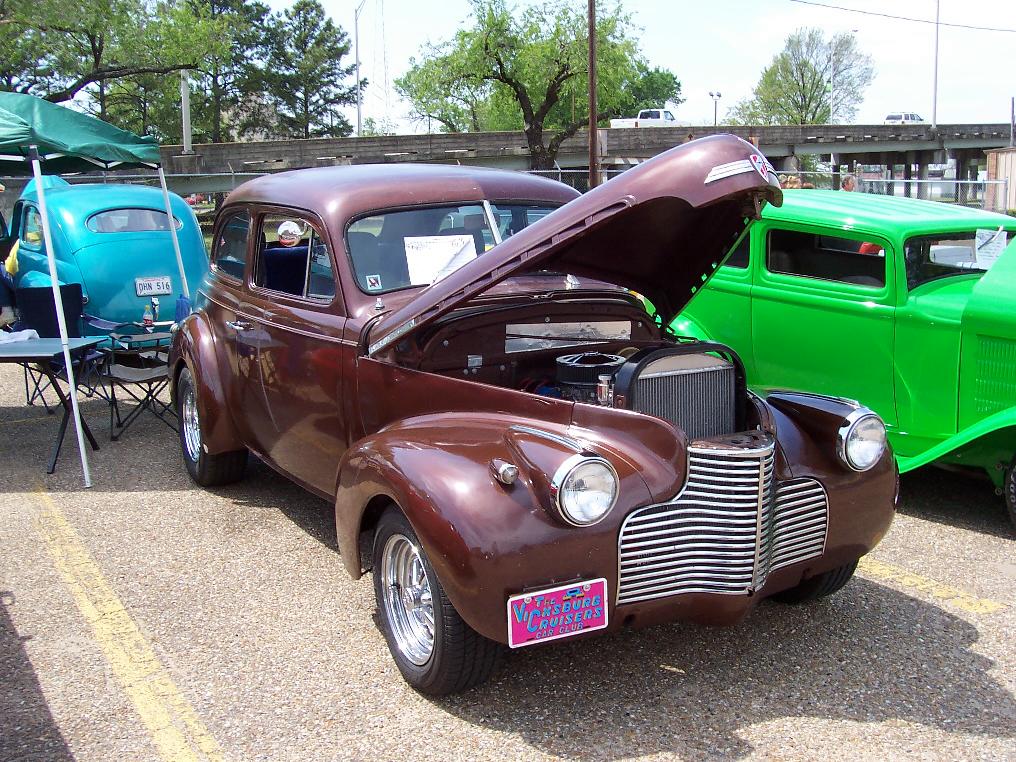
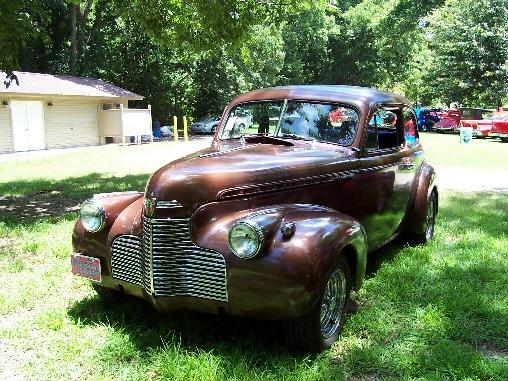
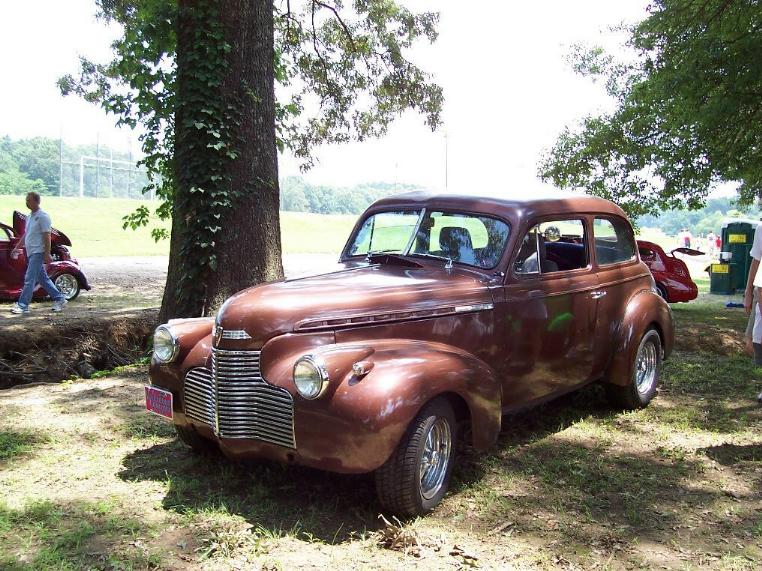
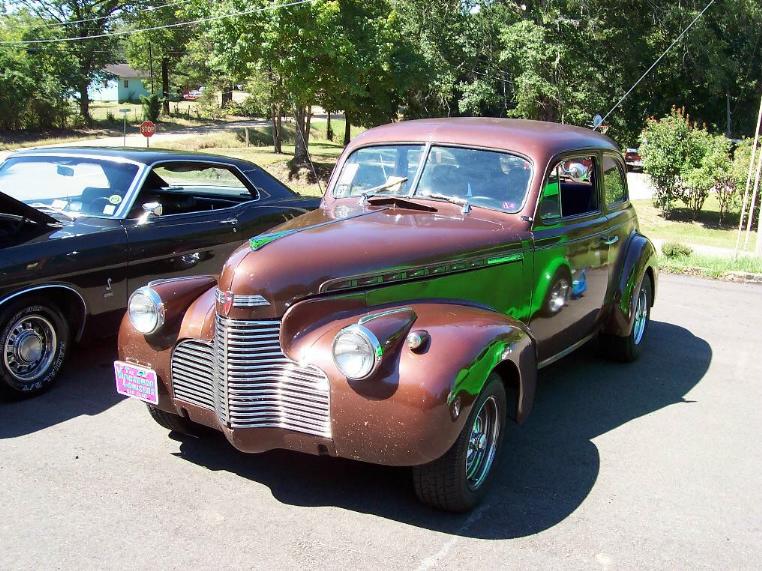
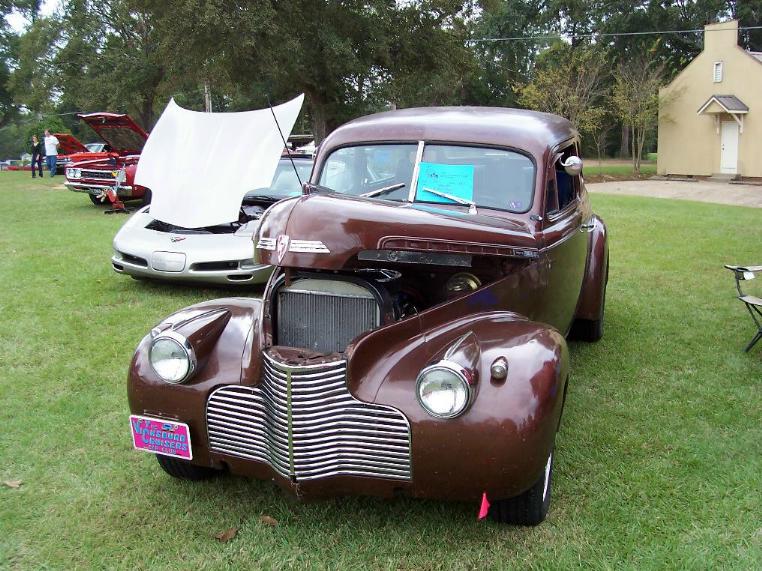
8/22/05 Update: Well...in spite of what I said earlier about how many car shows my '40 Chevy was going to go to in 2005, it didn't happen. I drove it to Newton, MS to the Loose Caboose car show and had a good time there. The car turned over 12,000 miles on this trip which was in March. On the way home, after filling up with gas, problems developed. First a bad gas knock...meant bad gas. Then I noticed a lot of white smoke coming from the exhaust and it wasn't shifting right. I drove it to my car club's car show in late March and then it stayed parked at home. Then I noticed another leak in the radiator. Higher octane gas helped the knocking. Tried swapping out the modulator valve on the transmission to help with the white smoke. Bought a new Walker radiator and put it in. Ended up buying another Turbo 350 transmission and new spark plugs, then new spark plugs again because I did not get the same ones as was in the car. Got the car back on the road in May and drove it to several more events and cruise nights. Just got back from Louisville, KY for the third straight year in the car and now it has over 15,000 miles on it. To sum it up...the Lord taught me patience this year and His timing on things, not mine...His plans, not mine. I went to those shows, but not with my '40. The other day we cut one ring off of the front springs and that lowered the car down to a better stance. The a/c in just about installed...I ran out of time before Louisville this year to get it finished up. I made a decision not to work on the car on Sunday's because it is not my day...it's the Lord's. That meant not having a/c for the trip, but I survived it without air for two years, what's one more time.
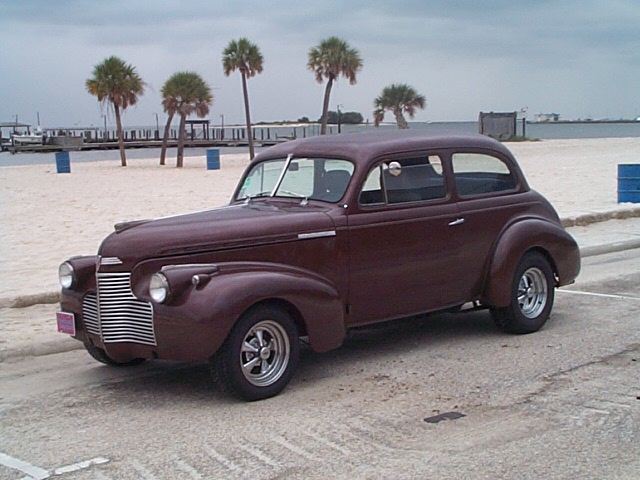
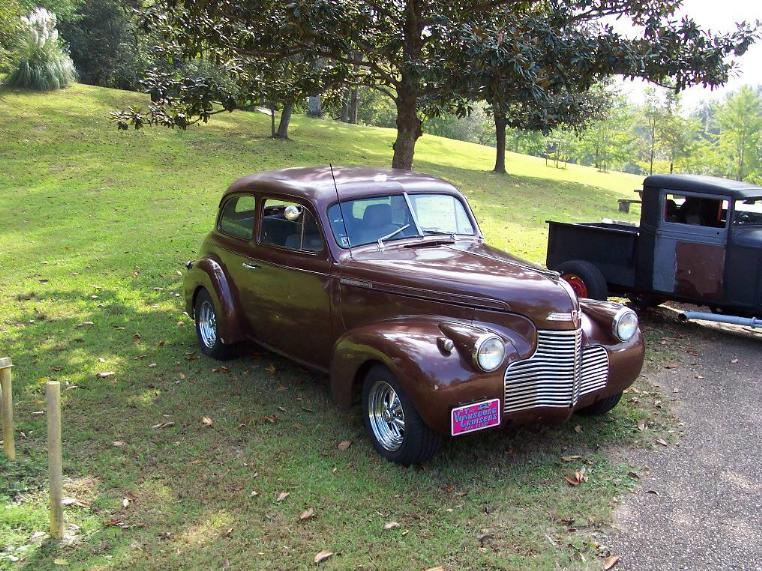
Here are some pictures of the car with the new stance: